
Recipe for Ezekiel Bread: 5 Secrets to Perfect Sprouted Loaves.
There’s something satisfying about pulling a warm, dense loaf of sprouted grain bread out of the oven, knowing every ingredient in it came from your own kitchen rather than a plastic bag on a grocery shelf. This recipe for Ezekiel bread is inspired by the grain-and-legume combination described in Ezekiel 4:9 — a mix of wheat, barley, beans, and lentils. It’s not an attempt to copy any commercial brand’s exact formula, just a homemade version built around that same idea: combining several grains and legumes into one hearty, satisfying loaf.
If you’ve only had the store-bought kind and found it dry or a little flavorless, a fresh homemade loaf is a different experience entirely — moist, faintly sweet from the sprouted grains, and good enough to eat plain, still warm, with just a little butter.
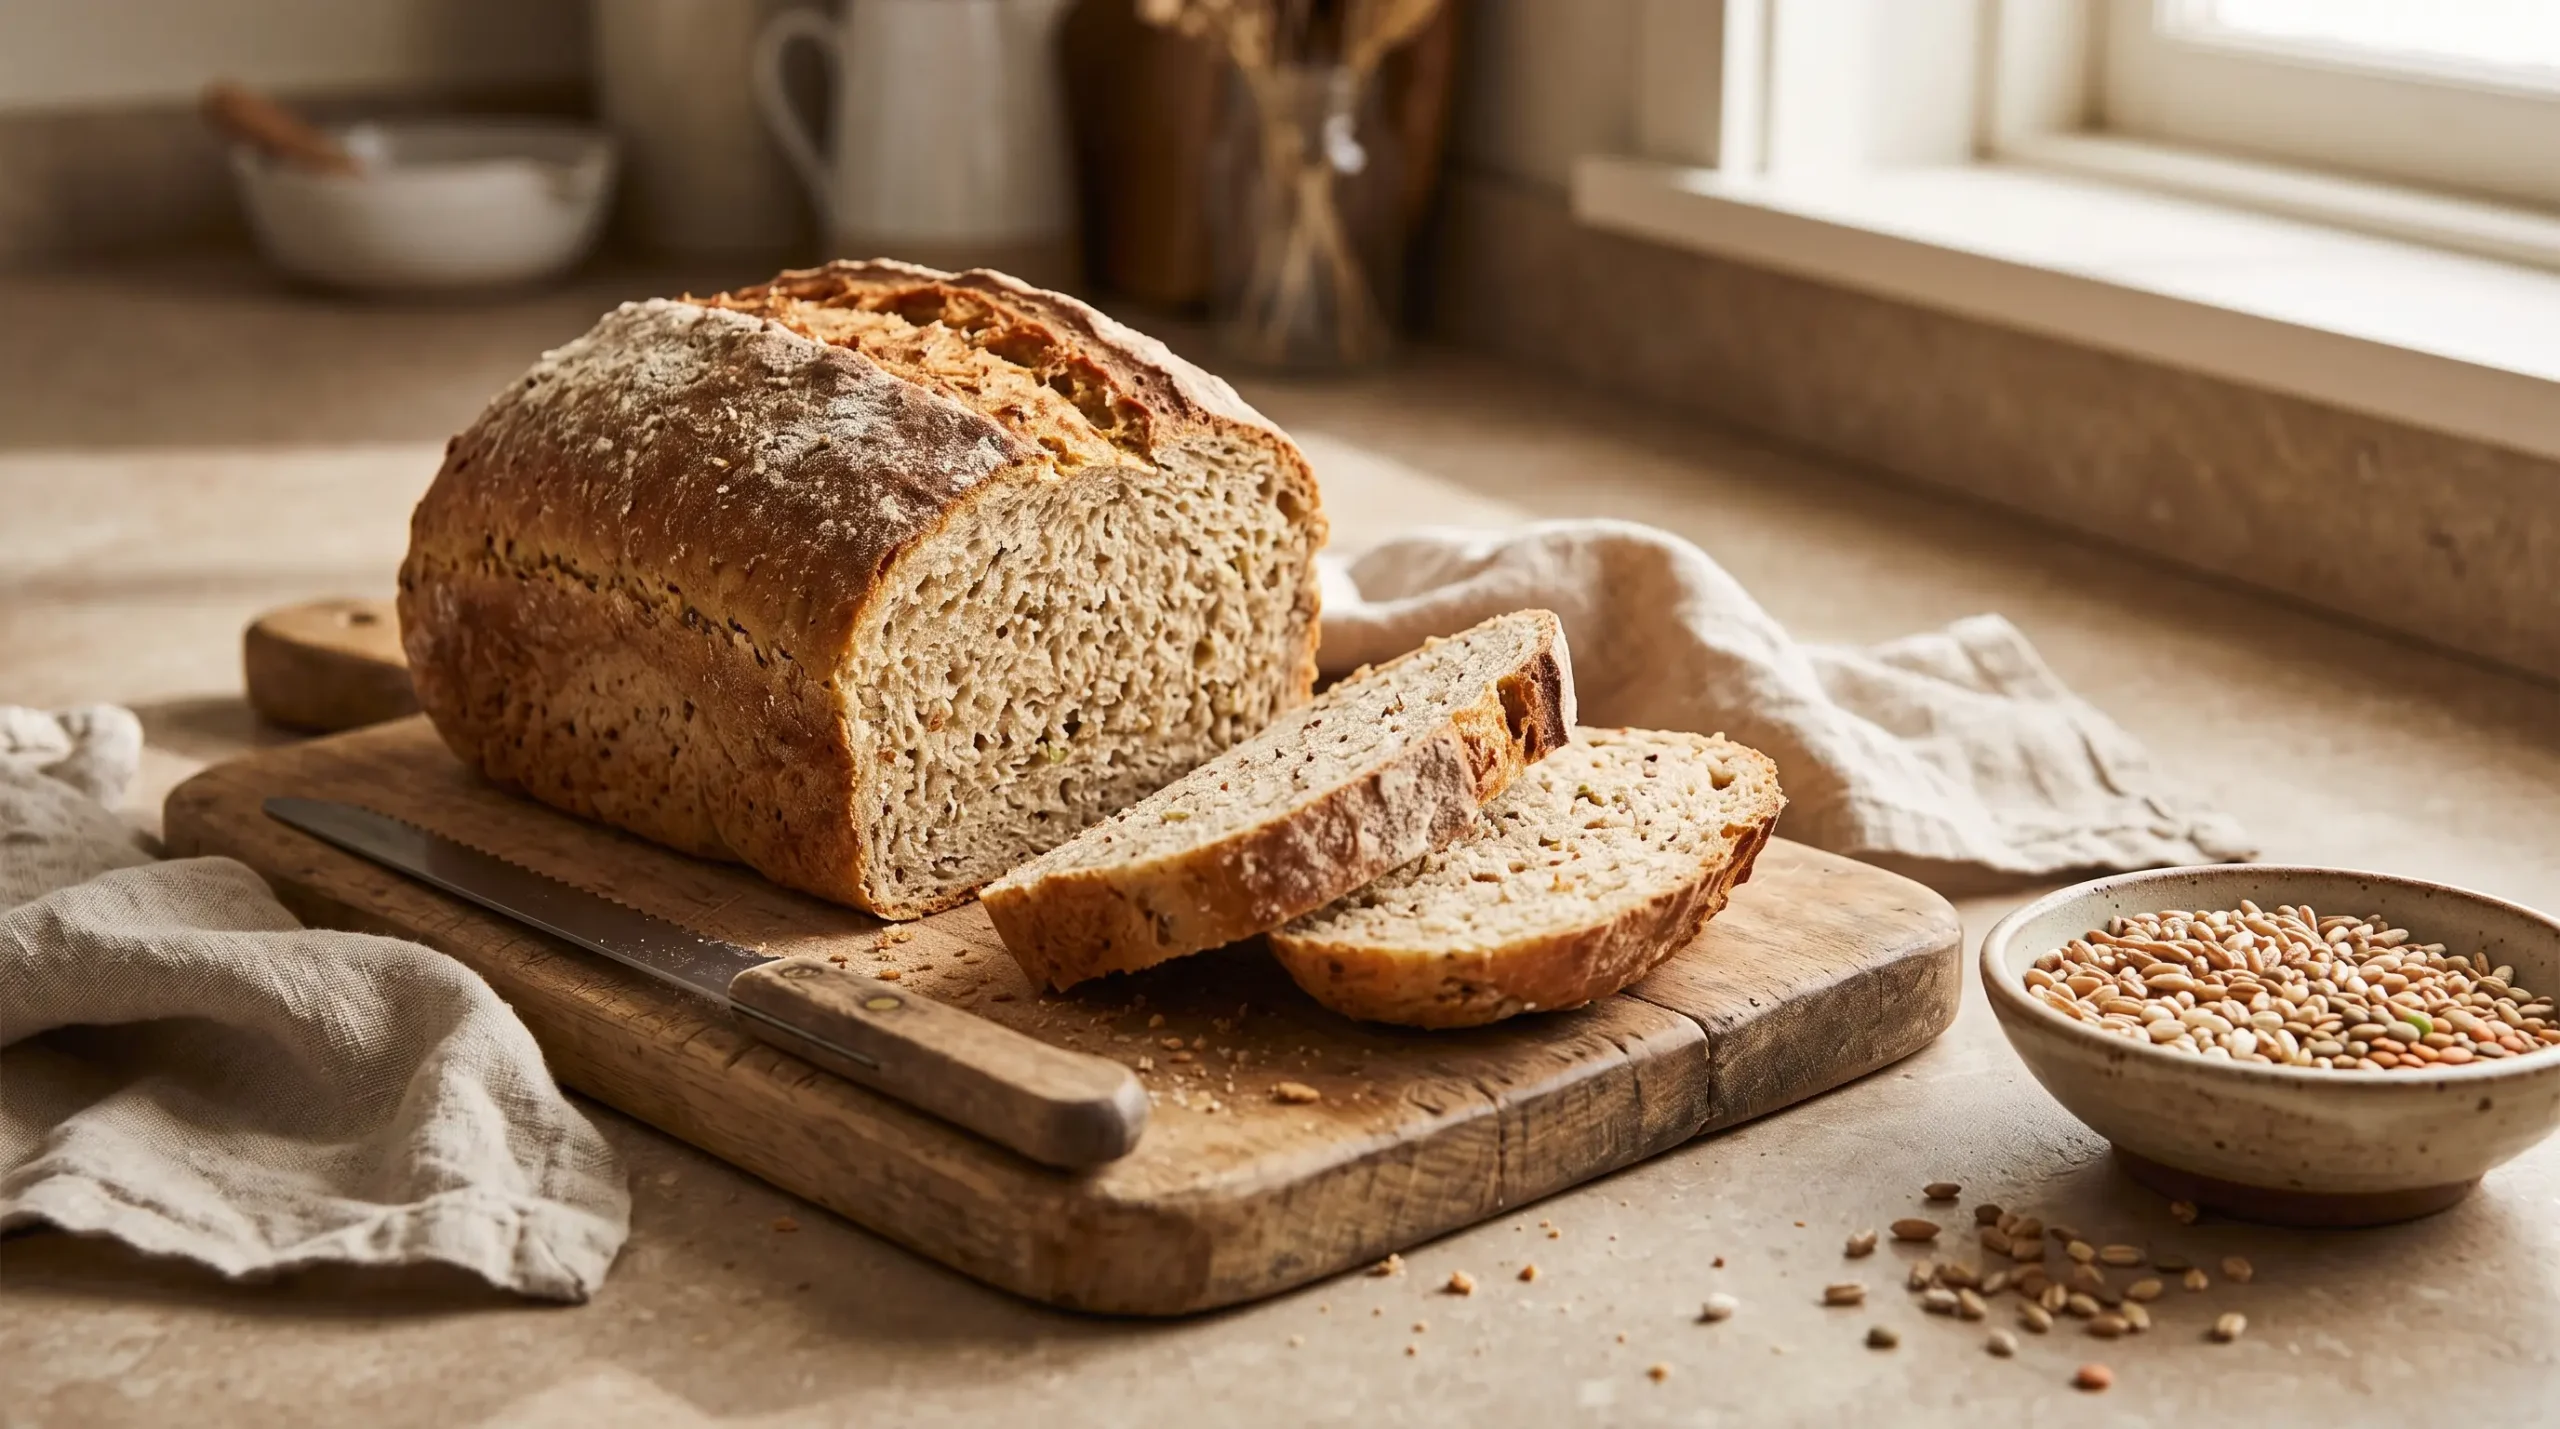
Recipe for Ezekiel Bread
Ingredients
Method
- Combine the dry ingredients: Mix the sprouted wheat, barley, rice or millet, lentil flour, optional bean flour, yeast, and salt in a large bowl.
- Add the wet ingredients: Stir in the warm water, honey or maple syrup, and olive oil until a dough forms.
- Knead the dough: Knead until the dough becomes cohesive and elastic. Add a little flour or water if needed to adjust the consistency.
- Let the dough rise: Cover and leave in a warm place until noticeably expanded.
- Shape the loaf: Transfer the dough to a greased 9 × 5-inch loaf pan and smooth the top.
- Proof again: Let the dough rise until puffy.
- Bake: Bake at 350°F (175°C) for approximately 35–40 minutes, or until fully baked.
- Cool: Allow the loaf to cool completely before slicing.
Notes
Table of Contents
What Makes This Recipe for Ezekiel Bread Different
Unlike a standard sandwich loaf made from one type of refined flour, this bread combines several sprouted grains and a legume flour into a single dough. Sprouting is the process of soaking and germinating whole grains before they’re dried and milled into flour, which changes their flavor (nuttier, slightly sweet) and texture compared to regular whole wheat flour. Because sprouted flour behaves a little differently than what you may be used to — it absorbs liquid differently and produces a denser crumb — this bread is naturally more compact and hearty than a fluffy white loaf. That’s expected, not a flaw.
Ingredients for Homemade Ezekiel Bread
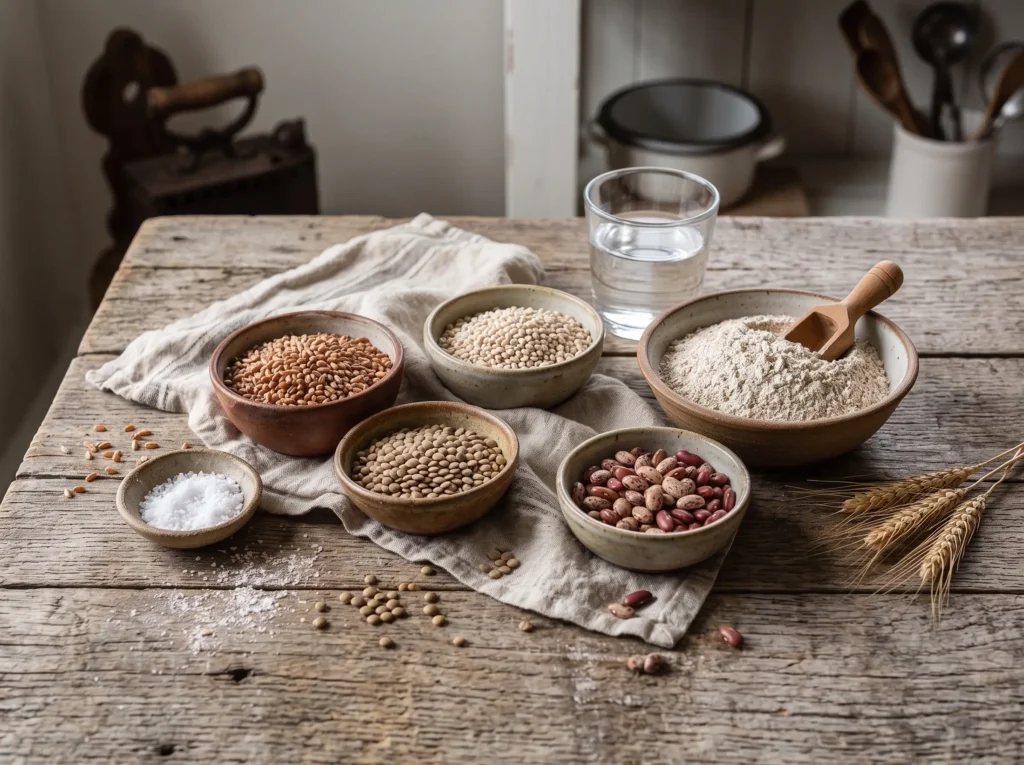
- 2 cups sprouted wheat flour (sprouted spelt flour works as a substitute and gives a slightly sweeter flavor)
- ½ cup sprouted barley flour (finely ground rolled oats can stand in if you can’t find this)
- ¼ cup sprouted brown rice flour or sprouted millet flour
- ¼ cup sprouted lentil flour
- 2 tablespoons sprouted soybean flour or another bean flour (optional — it adds protein but can be left out if unavailable)
- 2 ¼ teaspoons active dry yeast (one standard packet)
- 1 ¼ cups warm water (about 100–110°F — warm to the touch, not hot)
- 2 tablespoons honey or maple syrup
- 2 tablespoons olive oil, plus extra for greasing
- 1 ½ teaspoons fine sea salt
This ratio of flour to liquid is what produces a loaf that rises enough to fill a standard 9×5-inch pan without becoming too heavy or too airy — if you scale the recipe up or down, keep the flour-to-liquid ratio the same.
5 Secrets to Perfect Sprouted Bread
1. Choose Fresh Sprouted Flours
Not all sprouted flour is the same. Freshness matters more here than with regular flour — sprouted flour has a shorter shelf life and can taste slightly bitter or “off” if it’s been sitting in a pantry for months. Buy from a source with good turnover, and if you’re grinding your own sprouted grains at home, use them within a few weeks. If your flour smells musty or bitter before you even mix the dough, it will carry that flavor into the finished loaf.
2.Adjust Hydration for Sprouted Flour
Sprouted flours vary batch to batch in how much liquid they soak up, more than standard flour does. After mixing, the dough should feel tacky — it sticks lightly to your fingers but doesn’t cling in wet clumps. If it feels dry and is tearing rather than stretching, add water a teaspoon at a time. If it’s wet enough to stick heavily to the sides of the bowl and won’t come together, add flour a tablespoon at a time. Getting this right at the mixing stage matters more than following the exact cup measurements.
3. Knead Until the Dough Passes the Windowpane Test
Knead for 8–10 minutes by hand, or 5–6 minutes with a stand mixer’s dough hook. Properly developed dough looks smooth rather than shaggy, and feels elastic — when you poke it, it should slowly spring back rather than staying dented. A good check: pull off a small piece and stretch it gently between your fingers. If it stretches into a thin, slightly translucent sheet before tearing, the gluten is developed enough. If it tears almost immediately, keep kneading.
4. Know When the Dough Is Properly Proofed
Sprouted grain dough rises more slowly than dough made with refined flour, so treat the times below as a starting point, not a deadline.
- First rise: about 60 minutes, until the dough has roughly doubled in size and feels light and puffy when you press it — a gentle fingertip poke should leave an indent that slowly fills back in.
- Second rise (in the pan): about 30 minutes, until the dough crests just above the rim of the pan. It should look rounded and slightly domed, not flat.
If your kitchen is cool, both rises can take noticeably longer — that’s normal, and it’s better to wait than to bake underproofed dough.
5.Bake Fully and Cool Before Slicing
Bake at 350°F (175°C) for 35–40 minutes. The crust should be a deep golden brown, and the loaf should sound hollow when you tap the bottom. If you have an instant-read thermometer, the center should read at least 200°F. Then — and this is the step most people rush — let the loaf cool completely on a wire rack, which takes about an hour. Dense, grain-heavy breads like this one are still setting internally as they cool. Slice too early and you’ll get a gummy, underbaked-looking center even though the bread is fully cooked.
Recipe for Ezekiel Bread: Step-by-Step Instructions
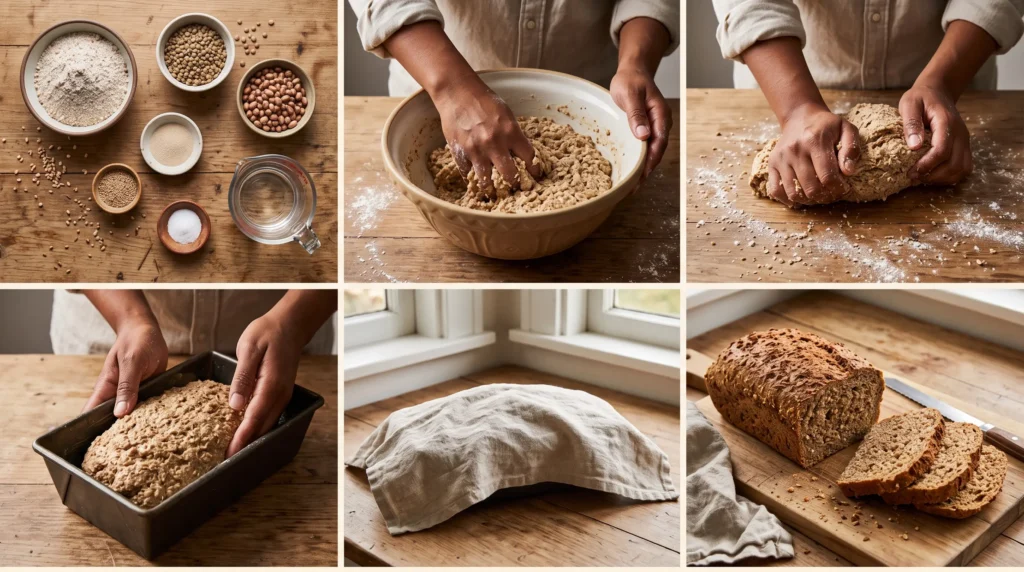
- Activate the yeast. Stir the warm water, honey (or maple syrup), and yeast together in a large bowl. Let it sit for 5–10 minutes. It should look foamy and slightly puffed on top when it’s ready. If nothing happens, your water was too hot, too cold, or the yeast has gone flat — start over rather than continuing.
- Mix the dry ingredients. In a separate bowl, whisk the sprouted flours, bean flour, and salt together so the salt is evenly distributed and doesn’t sit directly on the yeast when combined.
- Combine. Stir the olive oil into the yeast mixture, then gradually fold in the dry ingredients until a shaggy dough forms.
- Knead the dough. Knead by hand for 8–10 minutes, or with a dough hook for 5–6 minutes. See Secret #3 above for the signs that the dough is properly developed.
- First rise. Place the dough in a lightly oiled bowl, cover, and let it rise for about 60 minutes. Use the visual and touch cues in Secret #4 to know when it’s ready.
- Shape and pan. Punch down the dough, shape it into a loaf, and place it in a greased 9×5-inch loaf pan.
- Second rise. Cover and let rise until it crests above the rim of the pan.
- Bake at 350°F for 35–40 minutes, checking doneness with the cues from Secret #5.
- Cool completely on a wire rack — at least an hour — before slicing.
Tips for the Best Ezekiel Bread
- Don’t add too much flour while kneading.
- Watch the dough rather than relying only on the clock.
- Don’t overproof the second rise.
- Use an instant-read thermometer if available.
- Let the loaf cool completely before slicing.
Nutritional Information
Nutrition will vary depending on the exact flours you use, but as a general guide, one slice (based on a 16-slice loaf) contains roughly:
| Nutrient | Amount |
| Calories | ~110 |
| Protein | 5 g |
| Carbohydrates | 20 g |
| Fiber | 3 g |
| Fat | 2 g |
| Sodium | 135 mg |
The combination of grains and legumes gives this bread a reasonable amount of protein and fiber for a homemade loaf, but treat these figures as an estimate rather than a lab-tested value.
Healthier Adjustments
- Lower sodium: cut the salt to 1 teaspoon and add a pinch of dried herbs to keep the flavor balanced.
- Oil-free: substitute unsweetened applesauce for the olive oil.
- Extra fiber: stir in 2 tablespoons of ground flaxseed with the dry ingredients.
- Gluten sensitivity: sprouting can partially break down gluten proteins, and some people with mild sensitivities find sprouted grain bread easier to digest — but this bread is not gluten-free, and anyone with celiac disease should avoid it.
Serving Suggestions
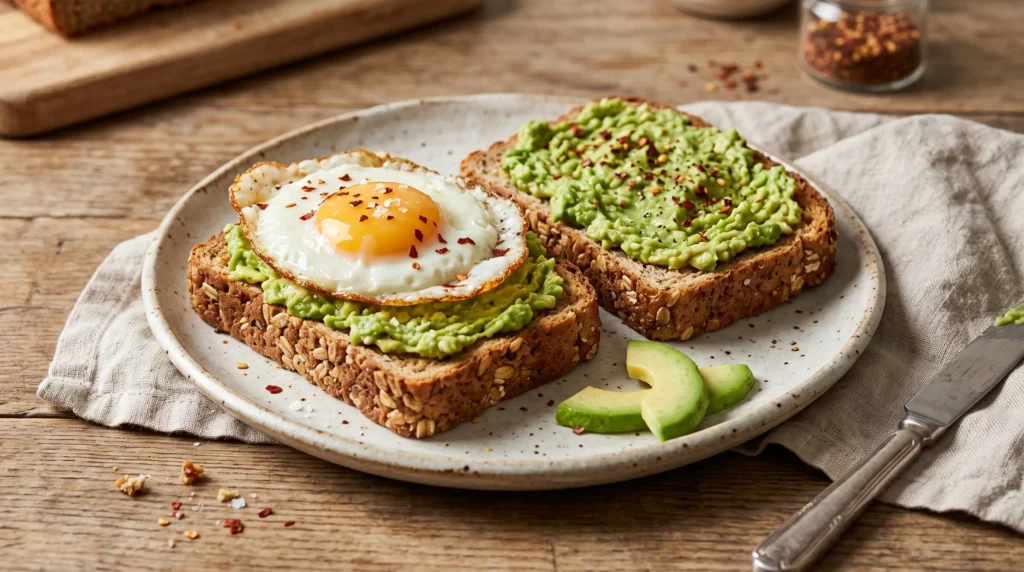
- Toasted, topped with mashed avocado, a fried egg, and a pinch of chili flakes.
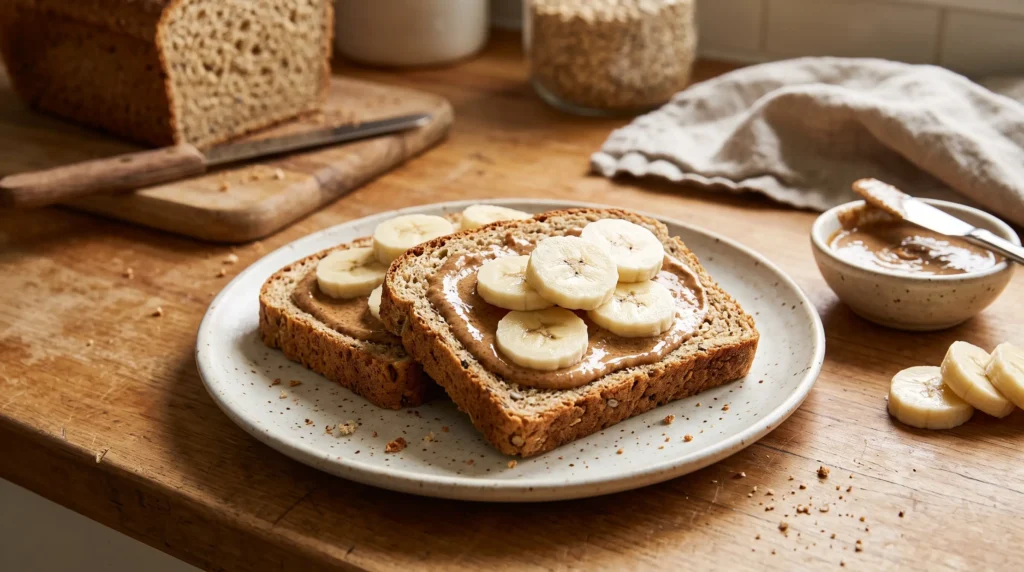
- Sliced thin with almond butter and banana.
- As an open-faced sandwich base with hummus and roasted vegetables.
- Alongside a bowl of soup or stew, where the dense crumb holds up well to dipping.
Common Ezekiel Bread Problems and How to Fix Them
Dense, heavy loaf. Usually means the dough was underproofed, or the yeast was old or inactive. Check that your yeast foams properly during activation, and don’t rush either rise.
Gummy center. This almost always means the bread was sliced before it finished cooling. Let it cool completely on a rack — cutting into a warm loaf traps steam that should be setting the crumb.
Dough not rising at all. The water was likely too hot (above 120°F kills yeast) or the yeast was expired. Test your yeast separately in warm water with a pinch of sugar before starting over.
Dough too sticky to handle. Sprouted flour absorbs liquid inconsistently between batches. Add flour a tablespoon at a time during kneading rather than all at once, so you don’t overcorrect.
Dry, crumbly loaf. Often caused by too much flour added during kneading, or overbaking. Measure by spooning flour into the cup and leveling it rather than scooping directly from the bag, and start checking for doneness at the 35-minute mark.
Loaf collapsing after baking. Usually a sign of overproofing — the dough rose too far before baking and couldn’t support its own structure in the oven. Watch for the second rise cues above rather than letting it go longer “just to be safe.”
Crust too dark. If the top is browning too quickly before the inside finishes baking, tent it loosely with foil for the last 10–15 minutes.
How to Store Ezekiel Bread
- Room temperature: airtight container or bread bag, up to 3 days.
- Refrigerator: up to a week, though the fridge can dry the bread out faster than the counter.
- Freezer: slice before freezing so you can pull out and toast individual pieces; keeps well for up to 3 months in a freezer bag.
Conclusion
This homemade take on Ezekiel bread — built on sprouted grains, a legume flour, and careful attention to hydration, kneading, and proofing — produces a hearty, satisfying loaf you can make confidently once you know what to look for at each stage. Give it a try, and let us know in the comments how your loaf turned out, or leave a review below. Subscribe if you’d like more sprouted grain and whole-grain baking recipes as they’re published.
If you enjoy making homemade bread, you can also try my Ezekiel Bread Recipe or explore more delicious ideas in my Bread Recipes collection.
Recipe for Ezekiel Bread: FAQ
Can I use only one type of sprouted flour instead of the blend?
You can use all sprouted wheat flour in a pinch, but the mix of grains and legumes is what gives this bread its characteristic texture and flavor, so the result will be noticeably different.
Why is my dough so sticky compared to regular bread dough?
Sprouted flour absorbs liquid differently than standard flour, so a slightly tacky dough is normal. Add flour gradually rather than trying to match the texture of a bread dough you may have made before with all-purpose flour.
Do I need a stand mixer to make this recipe?
No. Hand-kneading for 8–10 minutes works well and actually makes it easier to feel when the dough has developed properly.
My loaf came out dense and gummy in the middle. What went wrong?
This is often caused by underproofing, old yeast, or slicing the loaf before it has fully cooled. Check all three before adjusting the recipe itself.
Can I freeze this bread?
Yes. Slice it first, then freeze it in an airtight bag for up to 3 months. You can toast the slices straight from frozen.
How long will this bread stay fresh?
This bread will generally stay fresh for about 3 days at room temperature, up to a week in the refrigerator, or several months in the freezer.
Bake It. Love It. Tell Us About It.
There are no reviews yet. Be the first one to write one.