
Chocolate Mug Cake: Easy Microwave Recipe in 5 Minutes.
Chocolate mug cake has saved me more late-night cravings than I’d like to admit. I first started making this microwave chocolate cake on nights when I wanted something warm and rich but couldn’t justify turning on the oven for a single slice. That’s really the whole appeal of a mug cake: it’s not a shrunken-down version of a “real” cake, it’s a dessert designed from the ground up to be fast, foolproof, and entirely yours. No leftovers you feel obligated to finish, no dishes beyond one mug and a spoon, no waiting around while an oven preheats.
If you’ve scrolled past a dozen mug cake recipes that all read the same, this one is written from actually making it — more times than I can count — with the small details that make the difference between a dense, gummy disappointment and a cake that genuinely tastes like something from a bakery case.
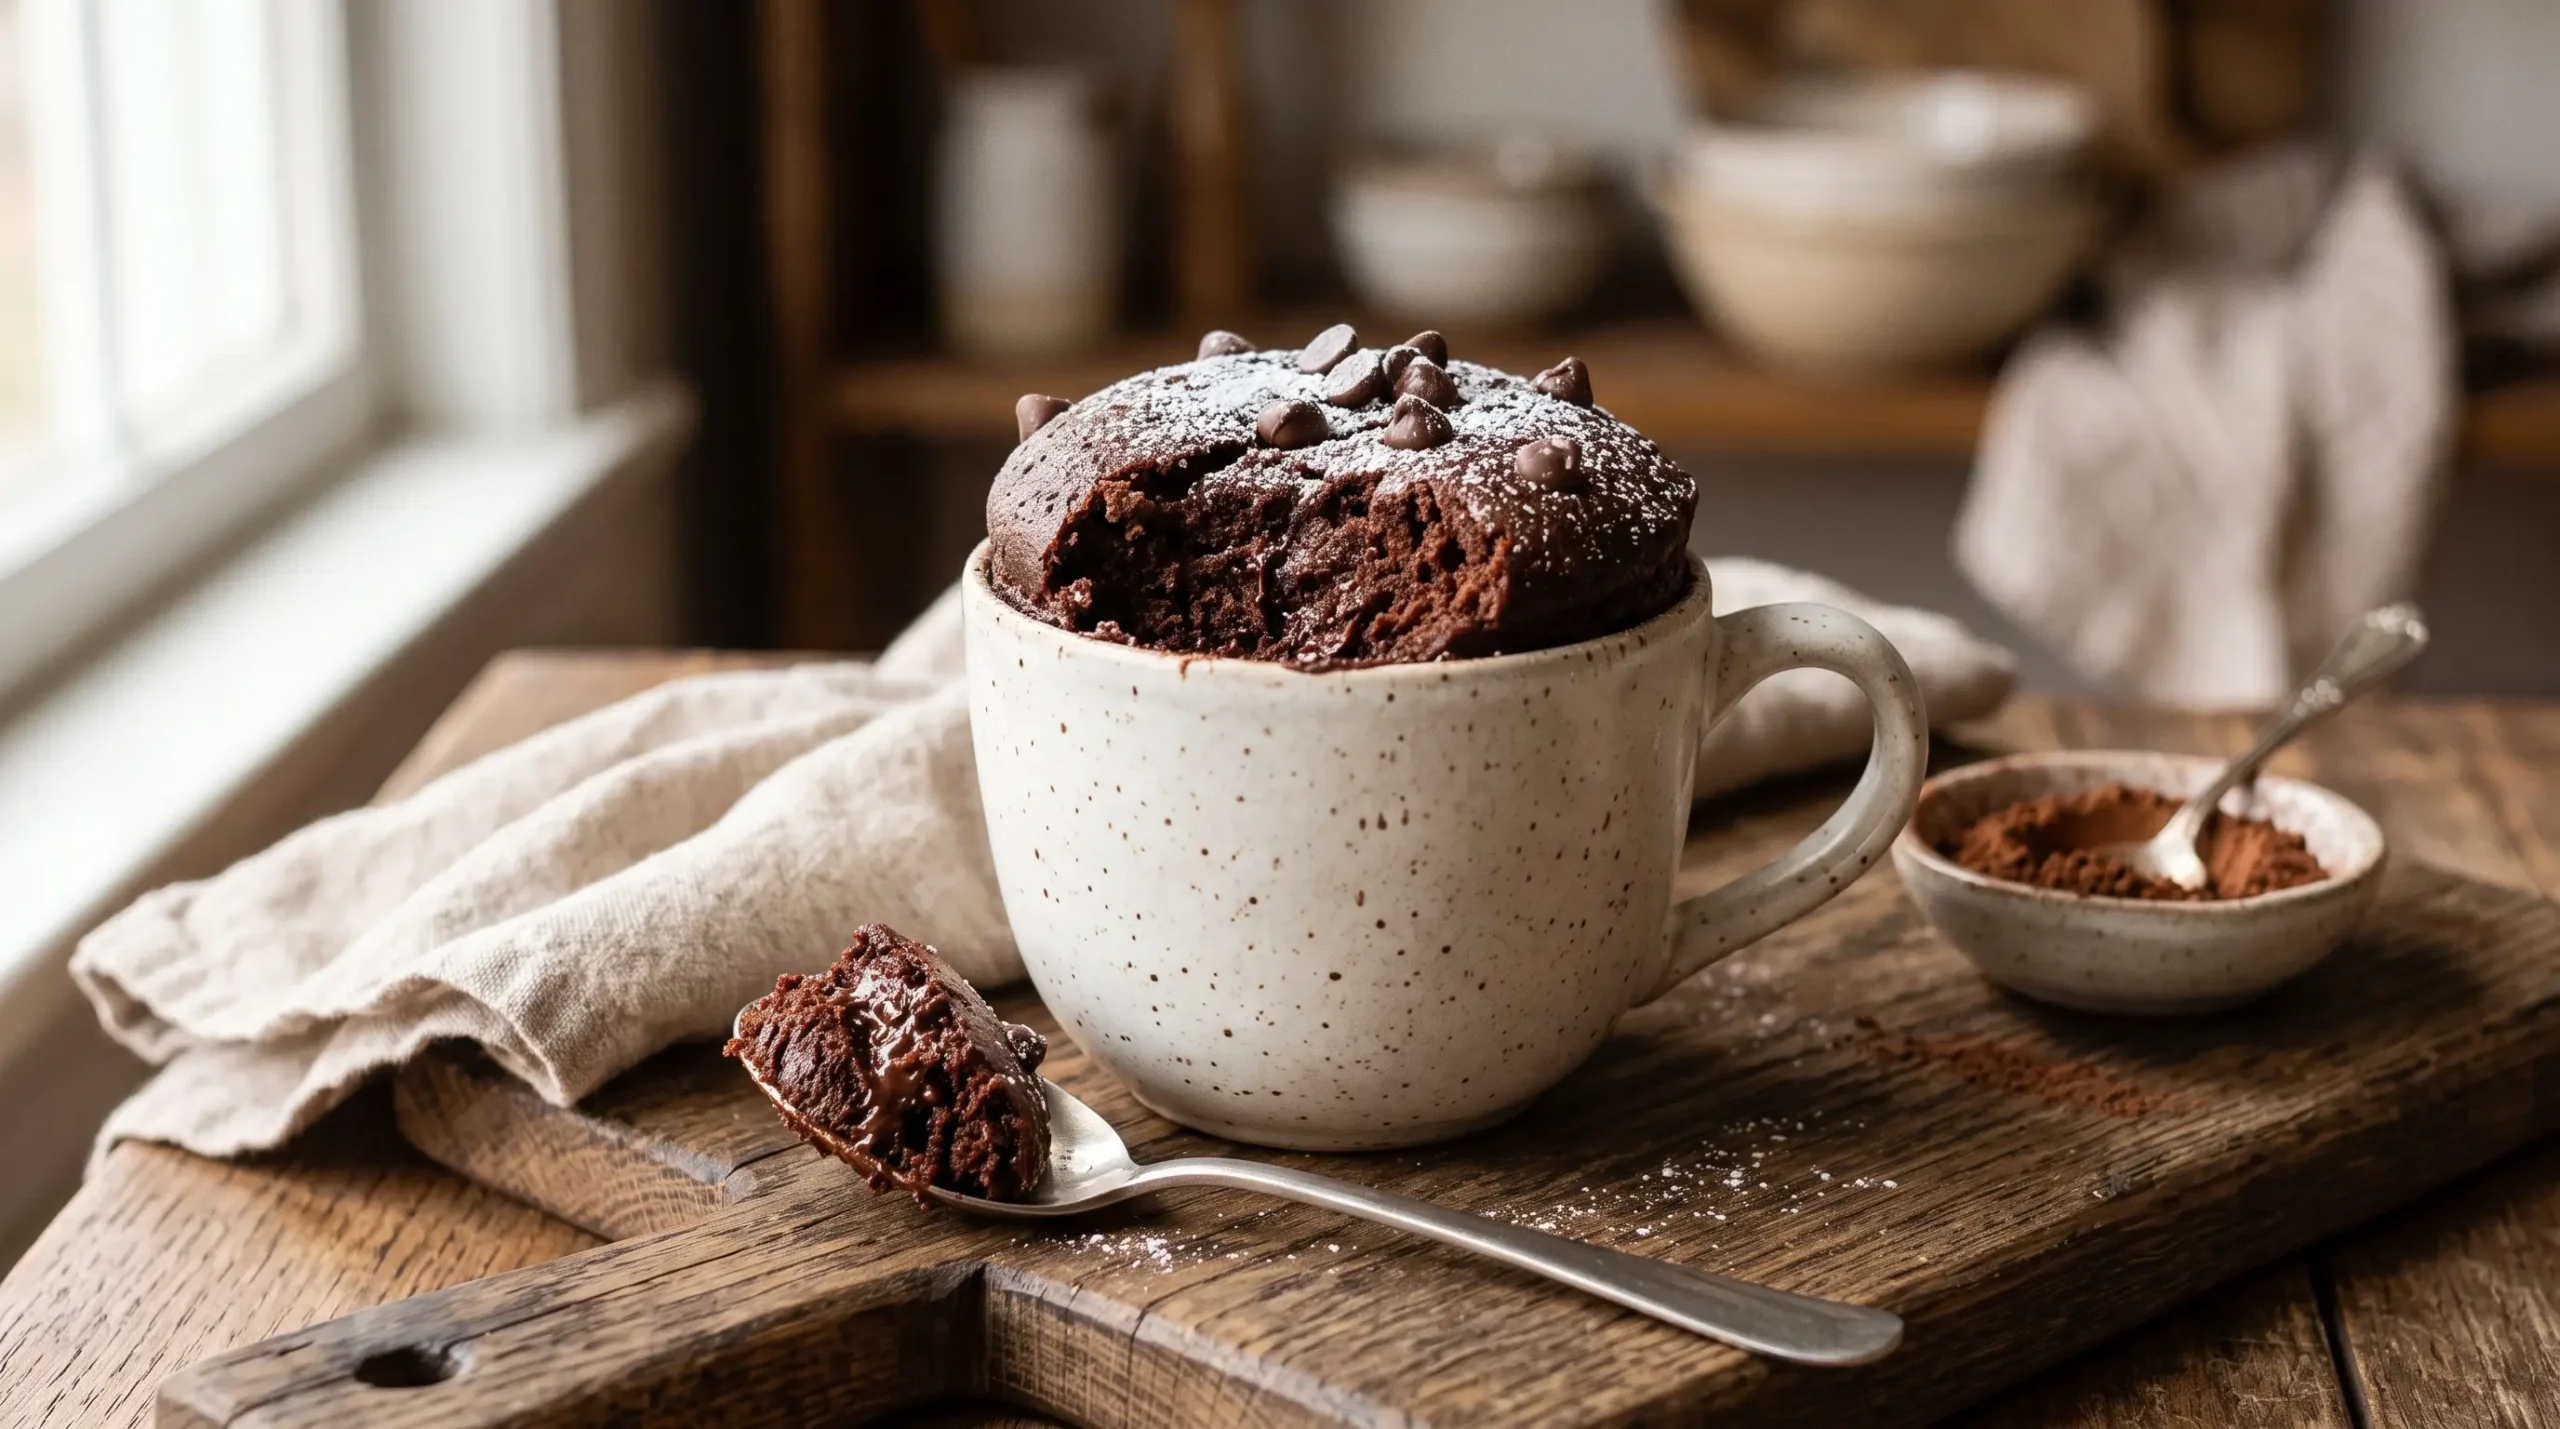
Chocolate Mug Cake
Ingredients
Method
- Add the flour, cocoa powder, sugar, baking powder, and salt to a microwave-safe mug. Stir until evenly combined.
- Pour in the milk, vegetable oil, and vanilla extract. Mix until the batter is smooth with no dry pockets remaining.
- Fold the chocolate chips into the batter.
- Microwave on high for 60–90 seconds, depending on your microwave’s wattage, until the cake is set but still slightly soft in the center.
- Let the mug cake cool for 1 minute before serving. Enjoy plain or with your favorite toppings.
Notes
- A 12-ounce mug helps prevent the batter from overflowing.
- Microwave wattages vary, so begin checking the cake after 60 seconds.
- Avoid overcooking, as this can make the cake dry or rubbery.
- Add flaky sea salt for a richer chocolate flavor.
- This recipe is naturally egg-free.
- Enjoy immediately for the best texture.
Table of Contents
Why You’ll Love This Recipe
- It’s genuinely fast. Not “30 minutes is fast” fast — this is done before your coffee finishes brewing.
- One bowl, one mug, done. There’s no stand mixer, no sheet pan, no cleanup marathon.
- It’s endlessly adaptable. Once you understand what each ingredient is doing, you can bend this easy mug cake recipe toward whatever you’re craving.
- No eggs required. The batter is simple enough that it skips the egg entirely, which also makes it easy to veganize.
- It actually tastes like cake. Done right, this isn’t rubbery microwave food — it has a tender crumb and a real fudgy center.
Equipment Needed
You don’t need much, which is half the charm:
- A microwave-safe mug, 12 ounces or larger. This isn’t a suggestion — undersized mugs are the number one reason people end up with batter overflowing onto their microwave turntable.
- A fork or small whisk for mixing directly in the mug.
- Measuring spoons (a kitchen scale is nice but not necessary at this small scale).
- A microwave with a turntable, ideally — it cooks the batter more evenly than a microwave that heats from one fixed point.
Ingredients for the Best Chocolate Mug Cake
This Chocolate Mug Cake uses simple pantry ingredients you probably already have at home.
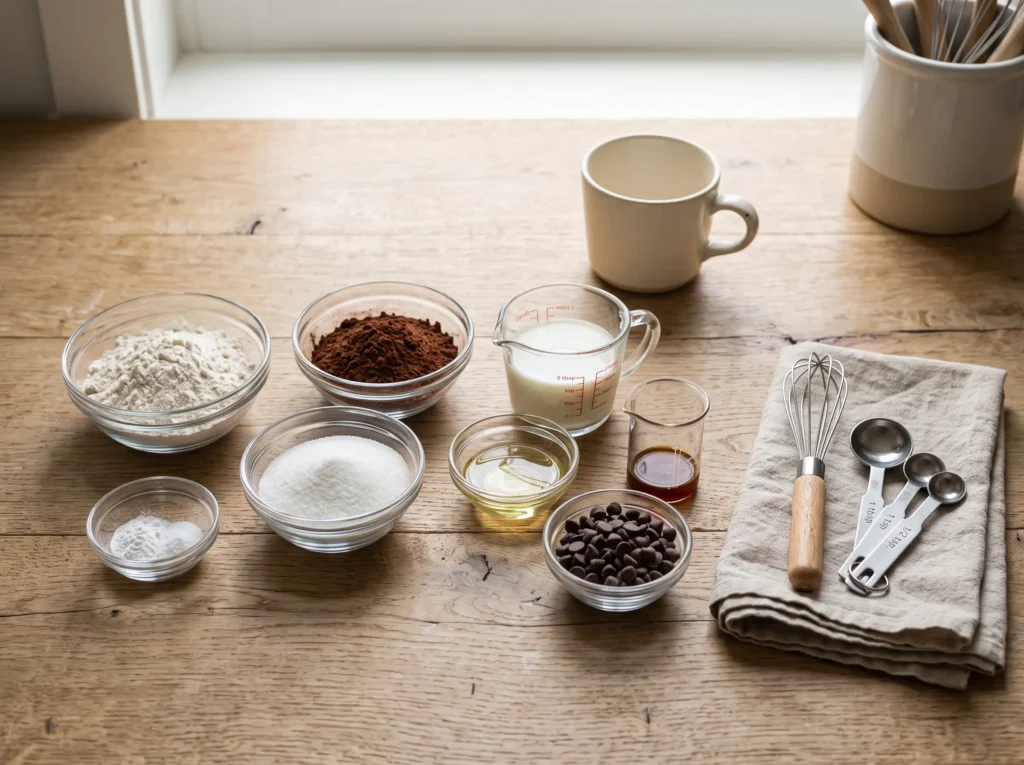
- 4 tablespoons all-purpose flour. This is your structure. Too little and the cake can’t hold itself together; too much and you’ll get a dry, cakey texture instead of the soft, slightly dense crumb a good mug cake should have.
- 4 tablespoons granulated sugar. Sugar isn’t just sweetness here — it also helps the cake stay moist as it cooks. Swap in light brown sugar if you want a deeper, almost caramel-like undertone; it also adds a touch more moisture thanks to its molasses content.
- 2 tablespoons unsweetened cocoa powder. This is where flavor is won or lost. Natural cocoa powder gives a brighter, slightly acidic chocolate flavor, while Dutch-process cocoa is smoother, darker, and less sharp — I lean Dutch-process for this recipe because it makes the cake taste more like a bakery brownie than a box mix.
- 1/8 teaspoon baking powder. Just enough lift so the cake rises into a proper dome rather than sitting flat and dense.
- A pinch of salt. Small, but don’t skip it — salt sharpens the chocolate flavor and keeps the whole thing from tasting one-note sweet.
- 3 tablespoons milk. Whole milk gives the richest result, but oat milk, almond milk, or soy milk all work well if that’s what you have.
- 2 tablespoons neutral oil, such as vegetable or canola oil. Oil (rather than butter) is part of why mug cakes stay soft even after they cool slightly — it doesn’t firm up the way butter does. Melted coconut oil is a good substitute if you want a faint coconut note.
- 1/4 teaspoon vanilla extract. Rounds out the chocolate and keeps the flavor from tasting flat.
- Optional: a small handful of chocolate chips. Not essential, but they create pockets of molten chocolate that turn a good mug cake into a great one.
Best Chocolate to Use
If you’re adding chocolate chips or chunks, semi-sweet works well against the not-too-sweet batter. Dark chocolate (60–70%) is my personal favorite here because it contrasts nicely rather than piling on more sweetness. Milk chocolate chips are the better choice if you want a sweeter, more dessert-shop flavor. Avoid white chocolate chips — they tend to sink and scorch slightly in the short microwave time.
Substitution tip: Out of all-purpose flour? A 1:1 gluten-free baking blend works with minimal change to the texture. Just make sure it’s a blend that already contains xanthan gum, or the crumb can turn slightly crumbly.
Timing
- Prep time: 2 minutes
- Cook time: 1–2 minutes
- Total time: Under 5 minutes
Microwave wattage matters more here than in almost any other recipe. A 1,000-watt microwave (fairly standard) will typically cook this cake in about 60–90 seconds. If your microwave is on the lower end — say, 700 watts — you may need closer to 2 minutes. High-wattage microwaves (1,200 watts and up) can finish this in as little as 50 seconds, and it’s very easy to overshoot and overcook it. The fix isn’t a fixed time, it’s a fixed approach: start checking at the low end of the range and add time in 10-second increments from there.
How to Make Chocolate Mug Cake
Follow these simple steps to make the perfect Chocolate Mug Cake every time.
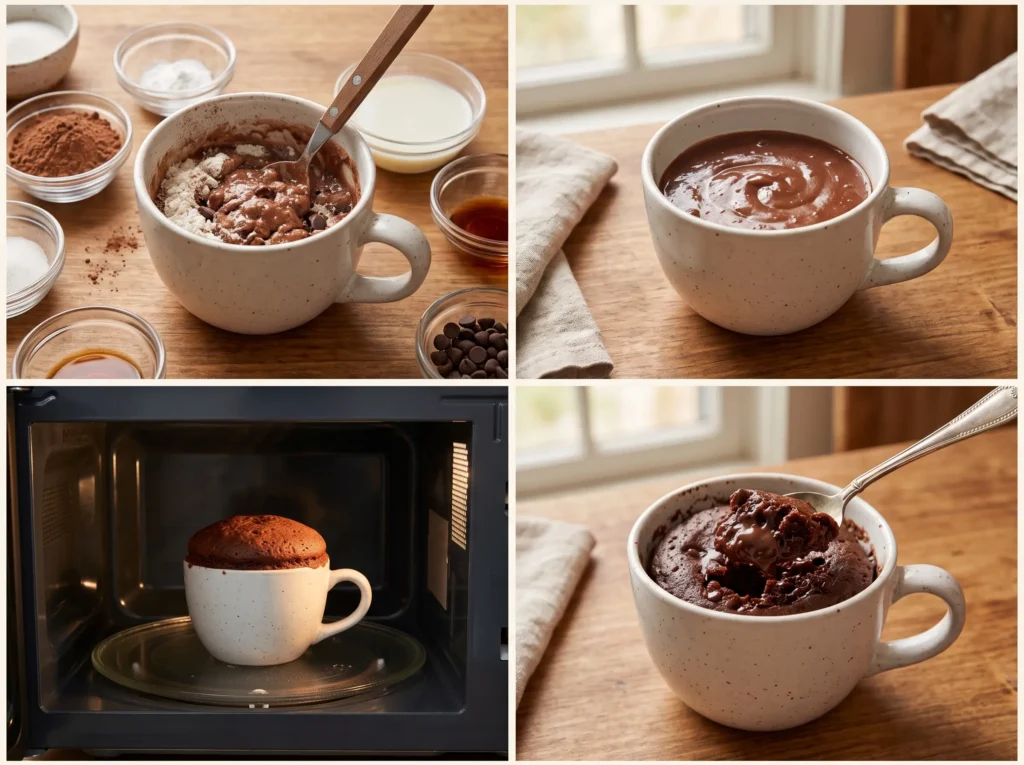
Step 1: Whisk the Dry Ingredients Together First
In your microwave-safe mug, whisk together the flour, sugar, cocoa powder, baking powder, and salt before adding anything wet. This matters more than it looks — cocoa powder clumps easily, and if you add liquid before breaking those clumps up, you’ll bite into little bitter, chalky pockets later. Take the extra 15 seconds to whisk the dry ingredients until the mixture is one even, uniform brown.
Step 2: Add the Wet Ingredients and Mix Until Smooth
Pour in the milk, oil, and vanilla extract. Stir with a fork, scraping the bottom and corners of the mug where dry ingredients like to hide. You’re looking for a batter that’s smooth, glossy, and pourable — similar in thickness to a good pancake batter. If it looks grainy or streaky, keep mixing; a rushed batter is the most common reason mug cakes bake unevenly.
Step 3: Fold in Chocolate Chips (Optional)
Fold in the chocolate chips gently rather than stirring vigorously — overmixing at this stage can start to toughen the batter. Press a few extra chips into the top of the batter for a bakery-style, slightly cracked finish once baked.
Step 4: Microwave and Watch Closely
Microwave on high, checking at 60 seconds first. You’re looking for a cake that has puffed into a dome, looks set around the edges, and appears just slightly underdone and glossy in the very center — that center will firm up from residual heat as it rests. The smell is actually one of your best cues: when it starts smelling deeply chocolatey rather than sweet and raw, it’s very close to done. If the top still looks wet and shiny all over with no structure, give it another 10–15 seconds.
Step 5: Let It Rest Before Digging In
Let the mug sit for a full minute before eating. This is the step most people skip, and it’s the one that separates a mediocre mug cake from a great one — that minute lets carryover heat finish setting the center without drying out the edges.
Nutritional Information
Approximate values per serving, based on standard ingredients with whole milk and vegetable oil:
| Nutrient | Amount |
| Calories | ~310 kcal |
| Total Fat | 14g |
| Saturated Fat | 3g |
| Carbohydrates | 42g |
| Sugar | 24g |
| Protein | 5g |
| Fiber | 2g |
| Sodium | 150mg |
Values shift with substitutions — oat milk, coconut oil, or added chocolate chips will all move these numbers slightly.
Healthier Alternatives
You can easily customize this microwave chocolate cake with a few healthier ingredient swaps.
- Natural sweeteners: Coconut sugar swaps in at a 1:1 ratio and brings a gentler glycemic impact, along with a light caramel note.
- Whole wheat flour: A 50/50 mix of whole wheat and all-purpose flour adds fiber without making the crumb noticeably denser — go beyond that ratio and the texture starts to turn heavy.
- Applesauce or mashed banana instead of oil: This cuts fat and adds natural sweetness, though the crumb will be slightly less rich and a touch more cake-like than fudgy.
- Protein boost: A tablespoon of chocolate or vanilla protein powder works well, but add an extra teaspoon of milk to compensate — protein powder absorbs more liquid than flour does.
- Dairy-free and vegan: Plant-based milk plus a flax egg (1 tablespoon ground flaxseed mixed with 3 tablespoons water, rested for 5 minutes) makes this fully vegan without changing the texture much.
Recipe Variations
- Peanut butter chocolate mug cake: Swirl a spoonful of peanut butter into the batter right before microwaving.
- Nutella mug cake: Replace the chocolate chips with a spoonful of Nutella dropped into the center of the batter for a molten middle.
- Mint chocolate mug cake: Add 1/8 teaspoon of peppermint extract in place of the vanilla.
- Mocha mug cake: Stir in 1/2 teaspoon of instant espresso powder — it doesn’t make the cake taste like coffee, it just deepens the chocolate flavor.
- Salted caramel mug cake: Drop a small spoonful of caramel sauce into the center of the batter before cooking, then finish with a pinch of flaky salt on top.
How to Serve Chocolate Mug Cake
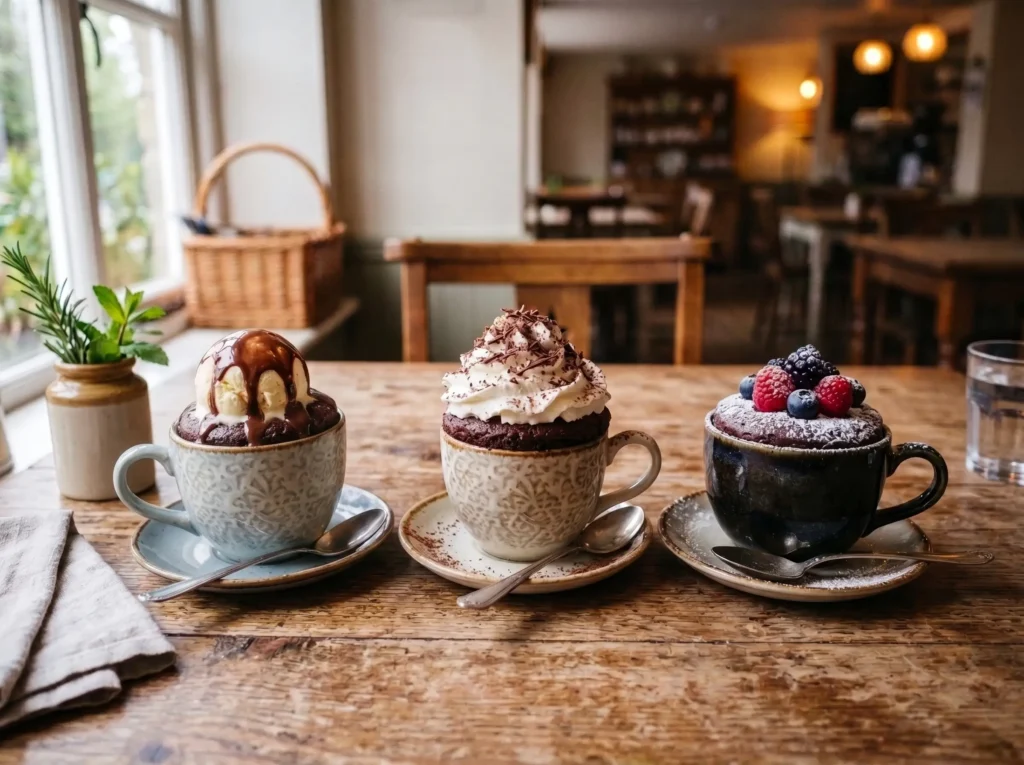
- A scoop of vanilla ice cream on top creates that warm-cold contrast that makes this feel like a real dessert, not a shortcut.
- Dust with powdered sugar and scatter a few fresh raspberries or strawberries over the top for a simple, restaurant-style presentation.
- Drizzle with peanut butter or salted caramel sauce for extra richness.
- Pair with a hot cup of coffee or chai for a cozy, café-style pairing.
- Layer crumbled mug cake with whipped cream in a small glass for an instant mini trifle.
Best Toppings
If you only add one thing, make it flaky sea salt — it’s the single easiest way to make this taste more like a bakery dessert and less like a microwave shortcut. Whipped cream, chopped toasted nuts, and a light drizzle of melted chocolate are close runners-up and pair perfectly with a warm Chocolate Mug Cake.
Common Chocolate Mug Cake Mistakes to Avoid
- Overcooking the cake. This happens because people treat the cook time as fixed rather than a starting point. Microwave wattage varies enough that the same recipe can be perfect at 60 seconds in one kitchen and rubbery in another. Fix it by checking early and adding time in small increments rather than microwaving for the full range up front.
- Skipping the dry-ingredient whisk. This happens when people are in a hurry to get to the wet ingredients. It leaves behind bitter cocoa clumps. Fix it by taking the extra 15–20 seconds to whisk the dry ingredients into one uniform color before adding anything liquid.
- Using a mug that’s too small. This happens because a lot of mugs simply look bigger than their actual volume. The batter can nearly double in size as it cooks. Fix it by using a mug that holds at least 12 ounces, or check the volume by filling it with water and measuring first.
- Not letting the cake rest. This happens because it’s tempting to dig in the second the microwave beeps. Cutting in too early makes even a properly cooked center look underdone. Fix it with a full minute of rest before your first bite.
- Overmixing after adding the flour. This happens when people keep stirring out of habit. It develops the flour’s structure too much and makes the texture noticeably denser. Fix it by mixing only until the streaks of flour disappear.
Troubleshooting
- My cake sank in the middle. This usually means it needed a little more time — pull it slightly earlier next time, or add 10 seconds if this keeps happening.
- The cake tastes bitter. Almost always cocoa powder that wasn’t fully incorporated, or too much natural (non-Dutch) cocoa without enough sugar to balance it.
- It boiled over in the microwave. The mug was too small for how much the batter expands. Size up to at least 12 ounces.
- The texture is gummy rather than fluffy. This is typically undercooking, not overmixing — give it another 10–15 seconds next time and check again.
How to Store Chocolate Mug Cake
Chocolate mug cake is really at its best fresh, but leftovers aren’t a lost cause:
- Room temperature: Cover and store for up to a day; the texture firms up slightly but is still enjoyable.
- Refrigerator: Keeps well for up to 3 days in an airtight container.
- Best reheating method: Microwave for 10–15 seconds on high, which is enough to loosen the crumb and bring back that just-made softness without drying it out further. Avoid longer reheats — they tend to toughen a cake that’s already been cooked once.
Make-Ahead Tips
You can pre-portion the dry ingredients — flour, sugar, cocoa powder, baking powder, and salt — into small jars or zip-top bags ahead of time. When a craving hits, just dump one portion into a mug, add the wet ingredients, and microwave. It turns this quick chocolate dessert into an almost instant one.
Expert Tips
- Weigh your cocoa powder if you bake this often — cocoa can pack down in the container, and a “tablespoon” scooped straight from the tin can vary more than you’d expect.
- If your microwave doesn’t have a turntable, pause it halfway through and give the mug a quarter turn to help it cook more evenly.
- A wider, shorter mug tends to cook more evenly than a tall, narrow one, since the batter sits in a shallower layer.
Conclusion
This single-serving Chocolate Mug Cake delivers a rich, fudgy dessert in under 5 minutes using just one mug and a microwave. Made with simple pantry staples, it offers easy substitutions and endless topping ideas, making it the quickest way to satisfy a chocolate craving.
Whether you’re looking for a late-night treat or a quick dessert after dinner, this chocolate cake in the mug is one you’ll want to make again and again. Try this microwave mug cake with your favorite toppings, and let us know how it turned out in the comments. If you enjoyed this recipe, subscribe for more easy baking recipes and quick homemade desserts.
Looking for more easy desserts? Try our creamy Strawberry Crunch Cheesecake for a no-bake favorite, or browse our complete Desserts collection for more quick and delicious homemade treats.
FAQs
Can I double this chocolate mug cake for two servings?
Yes, but use two separate mugs rather than one larger one. Doubling the batter in a single mug changes how it cooks, so the center takes longer to set while the edges cook more quickly. Using two mugs helps ensure each cake bakes evenly.
Why did my mug cake turn out rubbery?
This is almost always caused by overcooking. Because microwave wattage varies between models, start checking the cake at the lower end of the recommended cooking time. Remove it when the center still looks slightly glossy, as it will continue to cook for a few moments after you take it out of the microwave.
Can I make this microwave mug cake without eggs?
Yes. This recipe is naturally egg-free, making it easy to adapt for a vegan dessert. The flour provides structure, while the milk and oil keep the cake moist and tender.
What’s the best mug size to use?
Use a microwave-safe mug that holds at least 12 ounces. The batter rises significantly while cooking, and a smaller mug can easily overflow, creating a mess inside the microwave.
Can I bake this in the oven instead of the microwave?
Yes, although it takes longer than the microwave version. Bake the batter at 350°F (175°C) for about 15–18 minutes, or until a toothpick inserted into the center comes out mostly clean with a few moist crumbs.
Why does my cocoa powder change the flavor so much?
Natural cocoa powder has a brighter, slightly more acidic chocolate flavor, while Dutch-process cocoa is alkalized, giving it a smoother, darker, and richer taste. Both work well in this recipe, but they produce noticeably different flavor profiles.
Can I make this into an ice cream sundae-style dessert?
Absolutely. Let the mug cake rest for about one minute after cooking, then top it with a scoop of vanilla ice cream. The warmth of the cake will slightly melt the ice cream, creating a rich, indulgent dessert. You can also add chocolate sauce, whipped cream, or sprinkles for an extra-special treat.
Bake It. Love It. Tell Us About It.
There are no reviews yet. Be the first one to write one.