
Gluten Free Cheesecake: 10 Tips for a Silky Smooth Bake
What if the hardest part of a gluten free cheesecake isn’t the “gluten free” at all? Most classic New York style fillings are built from cream cheese, eggs, sugar, and sour cream, and none of those contain wheat. The only place gluten usually sneaks in is the cookie crust. That means a great gluten free cheesecake is less about special flours and more about technique: room-temperature dairy, gentle mixing, and a slow, steady bake.
This gluten free cheesecake recipe combines a buttery cookie crust with a rich, creamy filling. Below, you’ll find the ingredients, step-by-step instructions, and 10 practical tips to help you achieve a smooth texture and clean slices. Whether you’re preparing dessert for a family gathering or baking for someone who avoids gluten, checking ingredients and preventing cross-contact are essential.
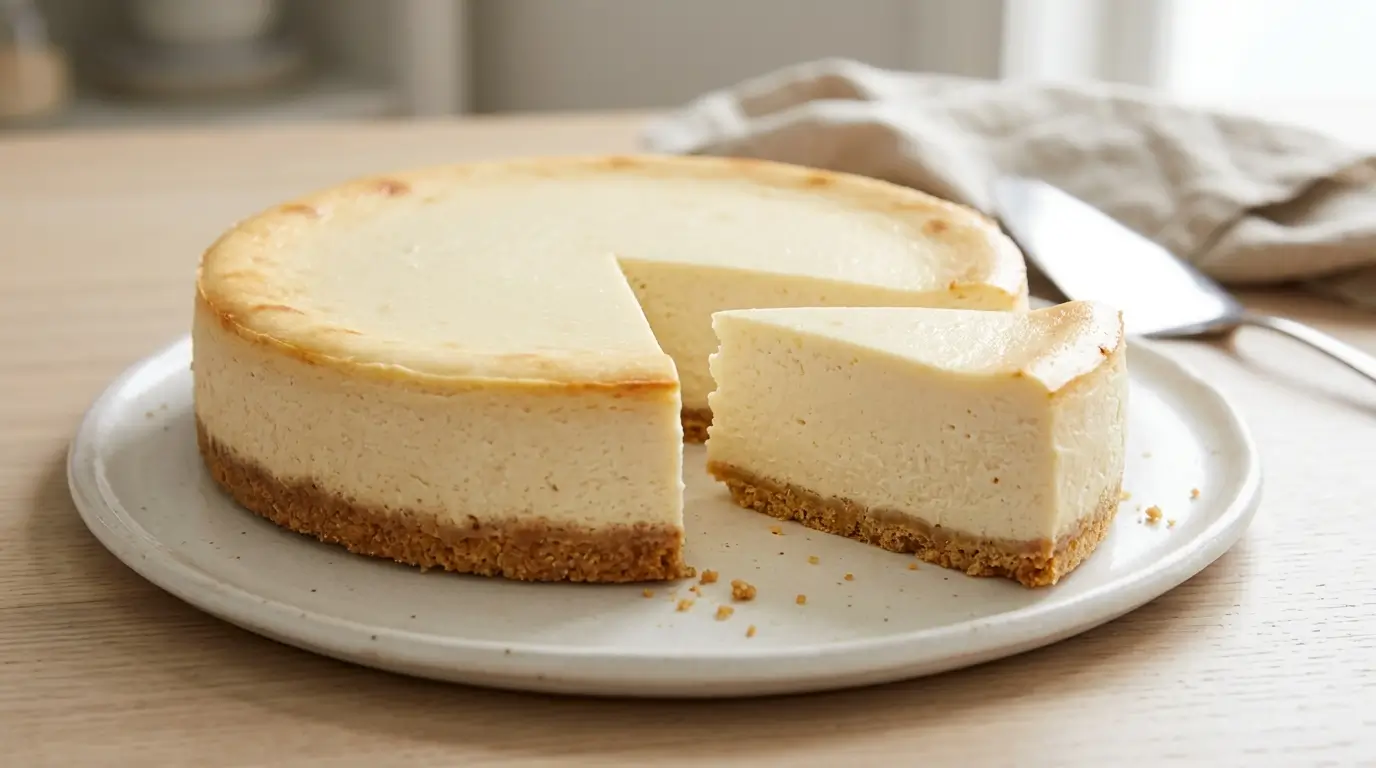
Gluten Free Cheesecake
Ingredients
Method
- **Preheat the oven:** Heat to 350°F (175°C). Grease a 9-inch springform pan.
- **Prepare the crust:** Mix the biscuit crumbs, melted butter, sugar, and salt. Press firmly into the pan and bake for 10 minutes.
- **Lower the temperature:** Reduce the oven to 325°F (160°C).
- **Mix the filling:** Beat the cream cheese until smooth. Mix in the sugar and cornstarch, then add the sour cream, vanilla, lemon juice, and salt.
- **Add the eggs:** Mix in the eggs one at a time on low speed, avoiding overmixing.
- **Fill the pan:** Pour the filling over the cooled crust and smooth the top.
- **Prepare the water bath:** Place the springform pan in a larger roasting pan and carefully add hot water around it, preventing water from entering the cheesecake.
- **Bake:** Bake for 55–65 minutes, until the edges are set and the center jiggles slightly.
- **Cool gradually:** Turn off the oven and leave the cheesecake inside with the door slightly open for 1 hour. Cool at room temperature for another hour.
- **Chill and serve:** Refrigerate for at least 6 hours, preferably overnight, before slicing and serving.
Notes
Table of Contents
Ingredients for Gluten Free Cheesecake
A short ingredient list means every item matters, so choose good ones. Here is what you’ll need for a 9-inch springform pan (12 slices).
For the crust
- 2 cups (200 g) gluten free graham-style crackers or gluten free digestive biscuits, finely crushed. They should smell toasty and slightly sweet.
- 6 tablespoons (85 g) unsalted butter, melted
- 2 tablespoons granulated sugar
- 1 pinch fine salt
Substitutions: Gluten free gingersnaps give a spicy edge. Certified gluten free oat cookies work well too. For a grain-free crust, use 1½ cups almond flour with the same butter and sugar.
For the filling
- 32 oz (900 g) full-fat cream cheese (four 8 oz blocks), softened to room temperature
- 1 cup (200 g) granulated sugar
- 3 tablespoons cornstarch (naturally gluten free, but check the label)
- ½ cup (120 g) sour cream, room temperature
- 4 large eggs, room temperature
- 1 tablespoon pure vanilla extract
- 1 tablespoon fresh lemon juice
- 1 pinch fine salt
Substitutions: Full-fat Greek yogurt can replace the sour cream for a little extra tang. Lactose-free cream cheese works in the same amounts. Swap the lemon juice for orange zest if you prefer a softer citrus note.
A quick label check: Gluten can hide in vanilla extract, cookies, and processed dairy add-ons. If you’re baking for someone with celiac disease, look for “gluten free” labels on every packaged item and use clean equipment.
Timing
- Prep time: 30 minutes (including crust)
- Bake time: 1 hour 10 minutes (10 minutes for the crust, about 60 minutes for the filling)
- Cooling time: 1 hour in the turned-off oven, then 1 hour on the counter
- Chill time: at least 6 hours, ideally overnight
- Total time: about 9 hours 40 minutes, with only about 40 minutes of that spent actively working
Most of the clock is hands-off. Plan to bake it the day before you want to serve it, since the chill is what gives the filling its dense, sliceable texture.
How to Make Gluten Free Cheesecake
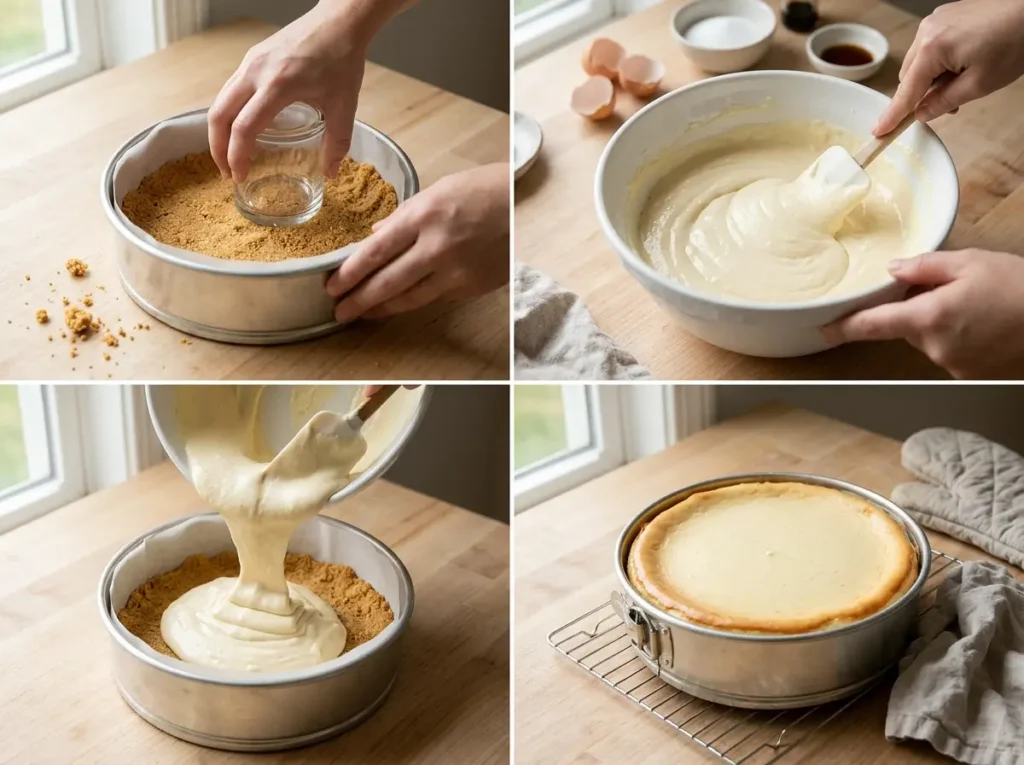
Step 1: Bring Everything to Room Temperature
Set the cream cheese, eggs, and sour cream on the counter for 1 to 2 hours before you start. Cold cream cheese leaves tiny lumps that never fully smooth out.
Tip 1: Press a finger into a block of cream cheese. If it dents easily with no resistance, it’s ready.
Step 2: Prepare the Pan and Water Bath
Preheat the oven to 350°F (175°C). Wrap the outside of the springform pan securely with heavy-duty foil, extending it above the sides to help prevent leaks. For extra protection, place the wrapped pan inside a larger oven-safe cake pan before setting it in the water bath. Grease the inside lightly.
Tip 2: A water bath (bain-marie) is your best defense against cracks. The steam keeps the oven environment humid and the edges from setting too quickly.
Step 3: Make and Bake the Crust
Mix the crushed crackers, melted butter, sugar, and salt until it looks like wet sand. Press it firmly across the bottom and about 1 inch up the sides using the flat bottom of a measuring cup. Bake for 10 minutes until fragrant, then cool slightly. Lower the oven to 325°F (160°C).
Tip 3: Gluten free crumbs can be drier than wheat-based ones. If the crust feels crumbly when pressed, add another tablespoon of melted butter.
Step 4: Beat the Cream Cheese First, and Only on Low
Beat the cream cheese on low-medium speed for 2 minutes until completely smooth and glossy. Scrape the bowl and paddle well. Add the sugar and cornstarch and mix until just combined.
Tip 4: Use the paddle attachment, not the whisk. A whisk whips in extra air, which expands in the oven and then collapses, causing cracks and sinking.
Step 5: Add Eggs One at a Time
Add the eggs one at a time, mixing on low just until each disappears into the batter. Over-beating at this stage is the most common cause of a puffed, then sunken cheesecake.
Tip 5: Stop mixing the moment the yolk streaks vanish.
Step 6: Fold In the Flavor
Stir in the sour cream, vanilla, lemon juice, and salt by hand or on the lowest speed. The batter should look thick, satiny, and pourable, like heavy ribbon.
Tip 6: Tap the bowl firmly on the counter a few times to bring large air bubbles to the surface, and pop any you see with a toothpick.
Step 7: Strain for Insurance
If you spot any small lumps, pour the batter through a fine-mesh sieve into the pan. This takes a minute and noticeably improves the texture.
Tip 7: Pour the batter onto the crust slowly and close to the surface to avoid splashing and trapped air.
Step 8: Bake in the Water Bath
Place the springform pan in a large roasting pan and carefully pour hot water into the roasting pan until it reaches halfway up the sides of the springform. Bake at 325°F (160°C) for 55 to 65 minutes. The edges should look set, and the center 2 to 3 inches should wobble like gelatin when you nudge the pan.
Tip 8: Trust the jiggle. The center firms up as it cools. Baking until it’s completely still means it’s overbaked.
Step 9: Cool Slowly
Turn off the oven, crack the door open, and let the cheesecake sit inside for 1 hour. Then lift it out of the water bath, remove the foil, and cool on the counter for another hour.
Tip 9: Run a thin knife around the edge as soon as it comes out of the oven. This releases the filling from the pan so it can contract without tearing.
Step 10: Chill Until Fully Set
Cover loosely and refrigerate for at least 6 hours, preferably overnight. Release the springform ring, slice with a hot, dry knife, and wipe the blade between cuts.
Tip 10: Patience is the final ingredient. A cold, fully set gluten free cheesecake slices cleanly and tastes noticeably creamier the next day.
Nutritional Information
These values are approximate, estimated from standard ingredient data for one slice (1/12 of the cheesecake). Brands vary, so treat them as a guide rather than an exact count.
| Nutrient | Per slice (approx.) |
| Calories | 440 |
| Total fat | 32 g |
| Saturated fat | 18 g |
| Carbohydrates | 32 g |
| Sugars | 22 g |
| Protein | 8 g |
| Sodium | 340 mg |
Keep in mind that the nutritional values are estimates, and ingredient substitutions may change them. If you’re counting carbs or sugar, the swaps below help.
Healthier Alternatives for the Recipe
You can adjust the recipe without losing the creamy texture.
- Less sugar: Reduce the sugar in the filling to ¾ cup (150 g). The texture holds, and the flavor is slightly less sweet and more tangy.
- Lighter tang: Replace the sour cream with plain full-fat Greek yogurt.
- Nut-based crust: Use almond flour or finely ground pecans with butter for a grain-free base.
- Lactose-free: Use lactose-free cream cheese and sour cream.
- Dairy-free: Plant-based cream cheeses vary widely in fat and moisture, so expect a different texture and test a small batch first.
- Portion control: Bake the filling in a muffin tin for 12 mini cheesecakes. Reduce the bake time to 18 to 22 minutes.
Serving Suggestions
A plain slice is lovely, but toppings make it special.
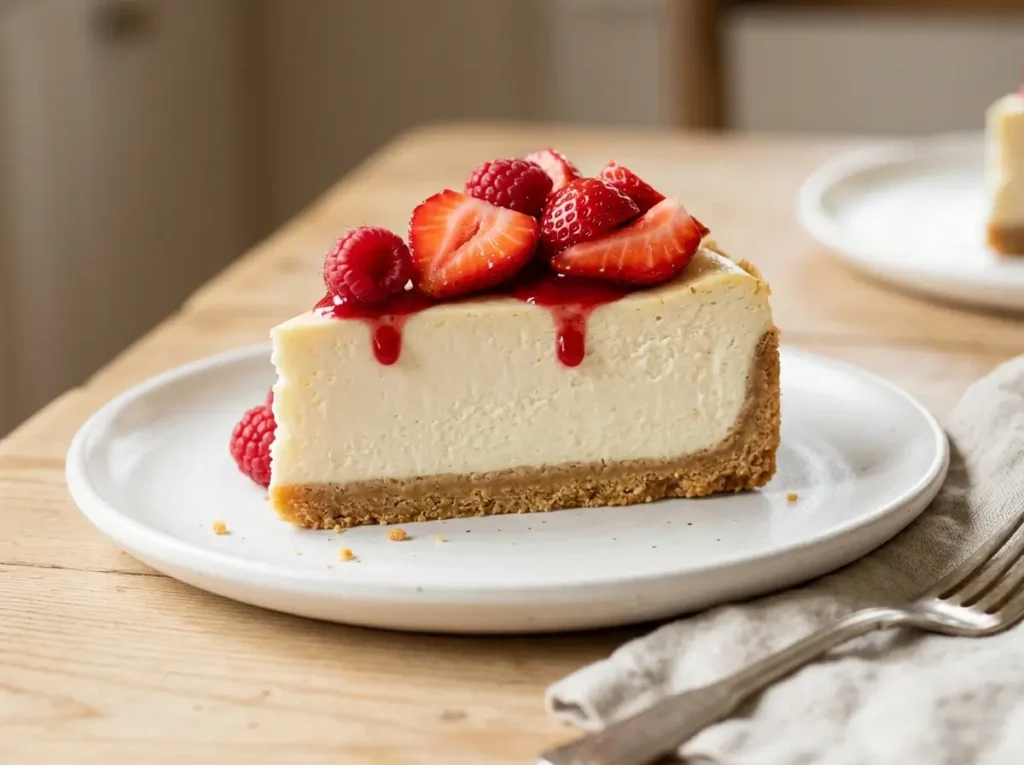
- Fresh berries and a spoonful of lemon curd for a bright contrast to the rich filling
- Warm cherry or blueberry compote, which suits a cozy autumn dinner
- Salted caramel drizzle with toasted pecans
- Whipped cream and shaved dark chocolate for a classic finish
- Macerated strawberries with a little sugar and lemon zest for a summer table
For a party, set out a topping bar with two or three options so guests can build their own slice. Always serve the cheesecake slightly cool rather than ice cold, about 20 minutes out of the fridge, for the best flavor and creaminess.
Common Gluten Free Cheesecake Problems
| Mistake | Why it happens | How to fix it |
| Cracked top | Over-mixing, oven too hot, or cooling too fast | Mix on low, use a water bath, and cool in the oven with the door ajar |
| Lumpy batter | Cream cheese was too cold | Soften for 1 to 2 hours and scrape the bowl often |
| Soggy crust | Water leaked into the pan | Wrap the pan in two layers of heavy-duty foil |
| Sunken center | Too much air beaten into the batter | Use the paddle attachment on low speed |
| Grainy or curdled texture | Overbaking or eggs added too quickly | Pull it out when the center still wobbles, and add eggs one at a time |
| Crumbly crust | Gluten free crumbs are drier | Add a tablespoon of butter and press firmly |
| Wet, loose center after chilling | Underbaked or not chilled long enough | Bake until the edges are set and chill overnight |
How to Store and Freeze Cheesecake
- Refrigerator: Cover and store for up to 4 days. Keep it away from strong-smelling foods, since cheesecake absorbs odors.
- Freezer: Freeze the whole cheesecake or individual slices on a tray until solid, then wrap tightly in plastic and foil. Store for up to 2 months. Thaw overnight in the fridge.
- Make ahead: The crust can be baked 1 to 2 days ahead and kept covered at room temperature. The finished cheesecake actually tastes better after a night in the fridge.
- Toppings: Add fresh fruit and sauces just before serving so the surface stays smooth.
Conclusion
This gluten free dessert combines a buttery crust with a smooth, creamy filling. Use room-temperature ingredients, mix gently, bake in a water bath, and allow plenty of time for cooling and chilling. If you try the recipe, leave a comment or review and share how it turned out.
Frequently Asked Questions About Gluten Free Cheesecake
Is cheesecake naturally gluten free?
The filling is usually gluten free because it contains cream cheese, eggs, and sugar. However, traditional cheesecake crusts often contain wheat-based cookies or crackers. Use certified gluten-free ingredients where appropriate, and check all labels to help prevent cross-contact.
Can I make gluten free cheesecake without a water bath?
Yes. A water bath helps the cheesecake bake gently and evenly, but you can bake it without one. To help reduce cracks, avoid overmixing, watch the center for a slight wobble, and let the cheesecake cool gradually in the turned-off oven.
How do I know when gluten free cheesecake is done?
The edges should look set while the center, about 2 to 3 inches across, still jiggles slightly when you gently move the pan. The cheesecake will continue to firm up as it cools and chills in the refrigerator.
Why did my gluten free cheesecake crack?
Cracks can develop from overmixing, excessive oven heat, overbaking, or cooling too quickly. Mix the batter gently, use a water bath if possible, and allow the cheesecake to cool gradually before refrigerating it.
Can I use gluten free flour instead of cornstarch?
Yes, but gluten free flour blends vary in composition and absorbency, so the texture may change. Use a tested substitution ratio rather than replacing the cornstarch cup for cup to help maintain a creamy filling.
How far ahead can I make gluten free cheesecake?
You can make this cheesecake up to two days ahead. After it has cooled, cover it and refrigerate it until serving. Chilling it overnight helps the filling set and makes slicing easier.
Can I use low-fat cream cheese?
Full-fat cream cheese is recommended for this recipe because it helps create a rich, creamy texture. Low-fat varieties may contain more moisture and can produce a softer filling, so results may vary.
What size pan should I use?
A 9-inch springform pan is recommended for this recipe. A 10-inch pan may also work, but the cheesecake will be thinner and may bake faster. Check for doneness early rather than relying only on the original baking time.