Pumpkin Cheesecake Balls: Irresistible No-Bake Dessert
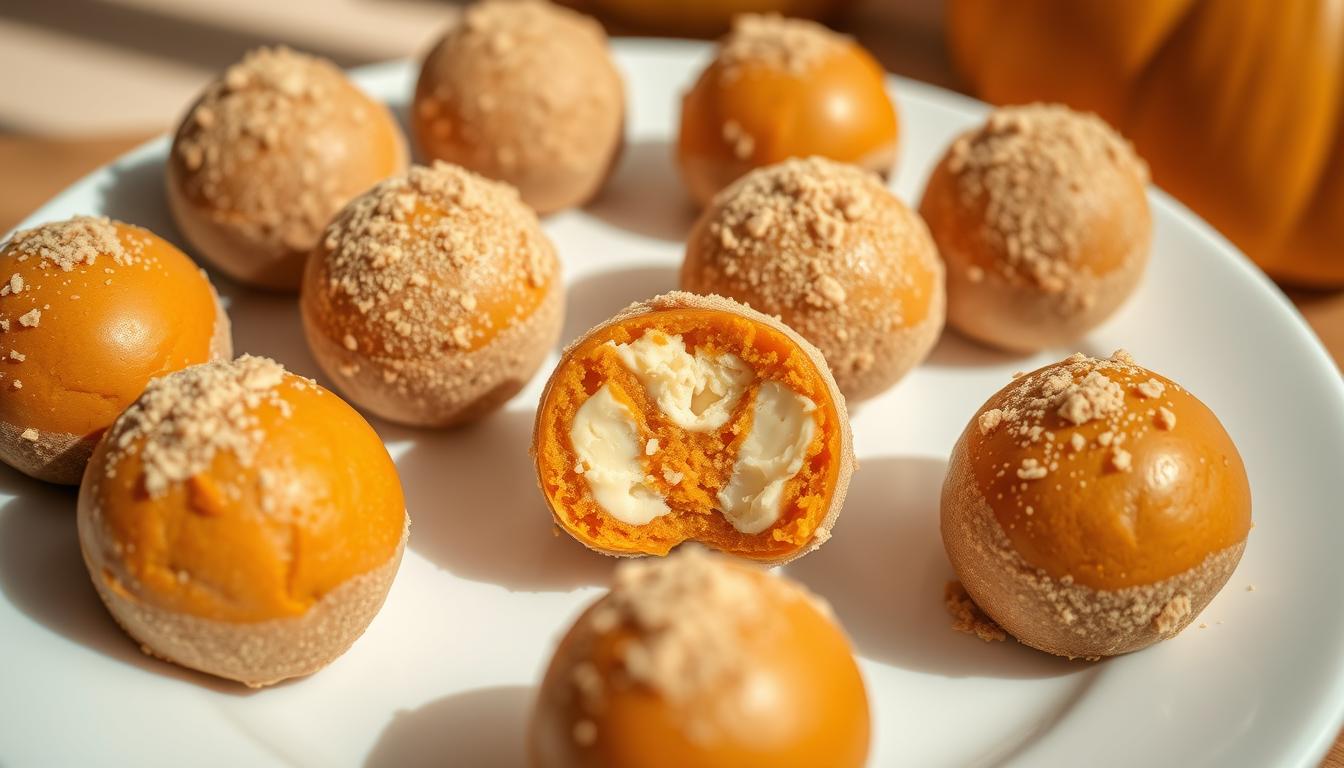
Pumpkin Cheesecake Balls are the perfect fall dessert — creamy, rich, and full of warm pumpkin pie spice flavor. If you’re looking for a no-bake pumpkin dessert to impress your friends and family, these bite-sized treats combine pumpkin and cheesecake into one irresistible bite.
Pumpkin cheesecake balls are a perfect no-bake dessert that has gained popularity during the fall season, offering a delightful balance of sweetness and spice. These delectable treats consist of a creamy pumpkin-infused center coated in chocolate or other toppings, making them a unique addition to your dessert repertoire.
As you explore this comprehensive guide, you’ll learn everything you need to know about making these irresistible dessert balls, from the necessary ingredients and equipment to troubleshooting tips and serving suggestions.
Table of Contents
Introduction to Pumpkin Cheesecake Balls
Pumpkin Cheesecake Balls capture the essence of fall in every bite, combining the creamy texture of cheesecake with the warm, spiced flavor of pumpkin pie spice and pumpkin pie. Pumpkin cheesecake balls are a delightful dessert that combines these flavors in a convenient, bite-sized form.
Why Pumpkin Cheesecake Balls Are the Perfect Fall Treat
Pumpkin Cheesecake Balls are the ultimate fall cheesecake bites — a unique way to enjoy cozy autumn flavors. These pumpkin cream cheese balls combine sweetness, spice, and creamy texture for a festive dessert everyone loves. The combination of pumpkin and cheesecake provides a delicious taste experience that’s both familiar and innovative.
No-Bake Pumpkin Dessert Advantage
One of the biggest advantages of Pumpkin Cheesecake Balls is that they’re a no-bake pumpkin dessert, making them incredibly easy to prepare and perfect for busy fall schedules. The no-bake aspect also means you can make them ahead of time, perfect for busy schedules or when preparing for large gatherings. Moreover, their simple preparation and ability to be made in advance make them a convenient option for a variety of occasions.
By combining the creamy texture of cheesecake with the warm, spiced flavor of pumpkin, these balls offer a delightful blend of flavors and textures. The outer coating adds a satisfying crunch, making them a perfect dessert for anyone looking for a unique and delicious treat.
Essential Ingredients for Pumpkin Cheesecake Balls
Using the right ingredients is key to making perfect pumpkin cheesecake balls with the ideal flavor and texture. To make these delicious treats, focus on a few key components.
Base Ingredients for Creamy Texture
The base ingredients form the foundation of your pumpkin cheesecake balls and cream cheese plays a crucial role—opt for full-fat cream cheese to achieve the creamiest, most satisfying texture. Lower-fat versions can make the balls watery and less likely to hold together. Additionally, unsalted butter is necessary to control the overall saltiness, especially since the cake mix contains salt.
Pumpkin Puree and Pumpkin Pie Spice
Pumpkin is, of course, a central ingredient. Be sure to use canned pumpkin puree—not pumpkin pie filling—to get the right flavor and consistency in your pumpkin cheesecake balls. Pumpkin pie spice, a cozy mix of cinnamon, nutmeg, ginger, cloves, and allspice, gives these pumpkin cream cheese balls their signature fall flavor and aroma..
Best Coating Options for Pumpkin Cream Cheese Balls
For the coating, you have several options, including chocolate chips. Other creative alternatives like graham cracker crumbs can complement the pumpkin flavor nicely. The coating you choose can make a big difference in both the taste and texture of your pumpkin cheesecake balls.
- For that rich, creamy texture in your pumpkin cheesecake balls, it’s important to use full-fat cream cheese.
- Know the difference between pure pumpkin puree and pumpkin pie filling.
- Discover how pumpkin pie spice adds that classic fall flavor to your pumpkin cheesecake balls.
- Explore various coating options, including chocolate chips and graham cracker crumbs.
Equipment You’ll Need
Before you start making pumpkin cheesecake balls, it’s crucial to have the right tools. The equipment you need can be categorized into two main groups: mixing tools and shaping and coating tools.
Mixing Tools for Smooth Consistency
To achieve the perfect consistency in your pumpkin cheesecake mixture, you’ll need a stand mixer or a hand mixer with a whisk attachment. A stand mixer is particularly useful for this task as it can handle heavy mixtures and provides consistent results. You’ll also need mixing bowls to hold your ingredients and a bowl to mix your cream cheese mixture. Accurate measuring is the key, so make sure you have measuring spoons and dry measuring cups on hand.
Shaping and Coating Essentials
For shaping your cheesecake mixture into uniform balls, a cookie scoop is highly recommended. This tool helps in creating balls of the same size, ensuring even coating and presentation. When it comes to coating, using parchment paper on your baking sheet prevents the cheesecake balls from sticking and makes cleanup easier. Additionally, a fork or candy dipping tools can be used to coat the cheesecake balls in chocolate, making the process much easier and more professional-looking.
Step-by-Step Instructions for Making Pumpkin Cheesecake Balls
With these easy-to-follow instructions, you’ll be able to create perfect Pumpkin Cheesecake Balls — an easy pumpkin dessert recipe that’s no-bake, flavorful, and ready in minutes. The process involves combining cream cheese with pumpkin and dry ingredients, then shaping the mixture into bite-sized treats.
Preparing the Cream Cheese Mixture
To start, beat cream cheese and butter (softened to room temperature) using a hand mixer or stand mixer with a whisk attachment until completely smooth. This step is essential for a smooth, lump-free mixture—be sure to soften your cream cheese properly to get the perfect consistency.
Adding the Pumpkin and Dry Ingredients
Next, stir in vanilla, pumpkin pie spice, pumpkin purée, powdered sugar, brown sugar, and cake mix into the cream cheese mixture. Beat until fully combined, then use a spatula to scrape the sides. Stir in toffee bits to complete the cheesecake mixture.
Shaping the Balls
Place a large piece of plastic wrap on your work surface and scoop the mixture into the center. Tightly wrap and form into a ball. Chill for 2 hours or until firm. Once the mixture is set, use a cookie scoop to form uniform balls. With a little practice, you’ll be shaping perfectly round cheesecake balls every time.
Coating Pumpkin Cheesecake Balls in Chocolate
To give your Pumpkin Cheesecake Balls that picture-perfect look, mastering the coating process is essential. A smooth chocolate shell transforms these fall cheesecake bites into an elegant, no-bake dessert centerpiece. The right coating can elevate the flavor and texture, making them more appealing to your guests.
Melting Chocolate Properly
Melting chocolate is an art that requires patience. Melt chocolate chips or coating chocolate in a heat-safe bowl by microwaving in 30-second bursts, stirring after each interval until the mixture is smooth. This method prevents the chocolate from burning and ensures a smooth coating.
Dipping Techniques
After melting your chocolate, it’s time to dip the pumpkin cheesecake balls. Roll each ball in the melted chocolate, then place it on a fork to gently tap off any excess coating. Use a spoon to drizzle chocolate over any uncovered spots. Then, use a toothpick to transfer the coated ball onto a lined baking sheet. Let the coating fully harden before serving.
By mastering the coating process, you’ll be able to create beautifully coated pumpkin cheesecake balls that are sure to impress.
Troubleshooting Common Issues
When making your pumpkin cheesecake balls, you may run into a few common challenges along the way. Understanding how to troubleshoot these problems can save you time and ensure your dessert turns out perfectly.
Fixing a Soft or Sticky Mixture
If your cheesecake mixture is too soft to shape into balls, you can thicken it by adding more dry ingredients. For instance, adding an extra two tablespoons of gingersnap crumbs can help firm it up. After mixing in the crumbs, chill the mixture in the refrigerator for 15 minutes.
Solving Chocolate Coating Problems
Chocolate coating can sometimes be tricky to work with. If the coating becomes too thick, you can reheat it in the microwave in 15-second intervals, stirring well after each interval until it reaches a smooth consistency. However, if the chocolate seizes up and refuses to melt smoothly, it’s best to discard it, as there’s no way to salvage seized chocolate.
To avoid issues with your pumpkin cheesecake balls, pay attention to the temperature and humidity in your kitchen, as these factors can significantly affect both the mixture and the coating process.

Creative Variations of Pumpkin Cheesecake Balls
Pumpkin cheesecake balls are a flexible dessert perfect for any occasion. You can experiment with different coatings, flavor additions, and substitutions to create unique variations.
Different Coatings and Toppings
One way to vary your pumpkin cheesecake balls is by changing the coating. Swap white almond bark for dark or milk chocolate to switch up the flavor. Feel free to try coatings like crushed graham crackers, gingersnap crumbs, or chopped nuts for added texture and flavor. For a festive vibe, use colored candy melts to match your party’s theme.
- Crushed graham crackers or gingersnap crumbs add a delightful crunch and enhance the flavor.
- Dark or milk chocolate for a richer, different chocolate taste.
- Colored candy melts for a themed drizzle
- Chopped nuts for added texture
Flavor Additions and Substitutions
To enhance the flavor of your pumpkin cheesecake balls, consider adding cinnamon chips, caramel bits, or a hint of maple extract. You can also substitute pumpkin puree with mashed sweet potato or butternut squash for a different twist. Trying additions like chai spices, cardamom, or orange zest can bring a global twist to your dessert.
How to Heat Treat Cake Mix for Food Safety
To minimize the risk of bacterial contamination in your no-bake pumpkin cheesecake balls, heat treating the spice cake mix is essential. Raw flour may harbor harmful bacteria such as Salmonella or E. coli, making it unsafe to eat without proper cooking.
Heat treating the cake mix is a simple process that can be done using either the microwave or oven method. This step is crucial for ensuring the safety of your dessert, especially when using raw ingredients that aren’t baked.
Quick Microwave Method
To heat treat cake mix in the microwave, place it in a microwave-safe bowl and heat in 30-second bursts, stirring after each, until the mixture reaches 165°F throughout. This method is quick and effective for small quantities.
Oven Method
For larger quantities, preheat your oven to 300°F. Cover a baking sheet with parchment paper and evenly spread the cake mix over it. Bake, stirring every 1.5 minutes, until the mix reaches 165°F. This method is ideal for heat treating larger batches of cake mix.

By heat treating your cake mix, you significantly reduce the risk of foodborne illnesses associated with raw flour, making your pumpkin cheesecake balls safer to enjoy. This precaution is particularly important when making no-bake desserts that include pie spice and other ingredients that aren’t cooked.
Storing and Making Ahead
The secret to keeping your pumpkin cheesecake balls delicious over time is proper storage. Proper storage ensures that these delicious treats remain fresh and retain their texture.
Refrigerator Storage Tips
Keep your no-bake pumpkin desserts fresh for up to 5 days in an airtight container. These Pumpkin Cheesecake Balls taste even better chilled. You can also wrap them in plastic wrap to add an extra layer of protection. When storing, keep the cheesecake balls away from strong-smelling foods, since they can easily absorb odors.
Freezing Pumpkin Cheesecake Balls
For extended storage, consider freezing your cheesecake balls. After shaping them into balls and coating, place them on a parchment-lined tray and freeze for about an hour. Once firm, place the cheesecake balls in an airtight container, layering parchment paper between them to prevent sticking. You can store them in the freezer for up to 2 months. When you’re ready to serve, remove them from the freezer and let them soften slightly at room temperature.
Serving Suggestions for Pumpkin Cheesecake Balls
When it comes to enjoying pumpkin cheesecake balls, the right accompaniments can elevate the experience. These delicious treats can be enjoyed in many ways, making them ideal for a variety of occasions.
Dippers and Pairing Ideas
Choosing the right dippers can enhance the flavors of your Pumpkin Cheesecake Balls. These fall cheesecake bites pair beautifully with graham crackers, cookies, or apple slices for a fun seasonal treat. Consider using graham crackers, vanilla wafers, or sliced apples like Granny Smith or Fuji to add a nice contrast in texture. Other options include Golden Oreos®, Biscoff® cookies, pretzels, or gingersnap cookies. These dippers not only enhance the taste but also add to the fun of enjoying your pumpkin cheesecake balls.
Presentation and Gift Ideas
Presentation is key when serving your cheesecake balls at gatherings or as gifts. You can arrange them on a platter or individual plates, garnished with a sprinkle of cinnamon or a few fall-themed decorations to match the fall season. Consider serving them in small cups or on a charcuterie board to add variety to your dessert display. Pairing your pumpkin cheesecake balls with warm beverages like coffee or hot chocolate can also enhance the overall experience, complementing the flavors and creating a cozy atmosphere.
Conclusion: The Best Fall Cheesecake Bites for Every Occasion
With this guide, you’re now ready to make irresistible Pumpkin Cheesecake Balls — the ultimate no-bake pumpkin dessert for fall. Whether you call them pumpkin cream cheese balls, fall cheesecake bites, or an easy pumpkin dessert recipe, they’re guaranteed to delight every guest.. This recipe offers the perfect blend of spice and sweetness, making it a great choice for fall gatherings or year-round entertaining.
The versatility of these cheesecake balls allows you to experiment with different coatings and spice levels, ensuring you can enjoy your pumpkin treats whenever you desire. With their make-ahead convenience and impressive presentation, you’re sure to impress your guests with this delightful pumpkin cheesecake balls recipe.
FAQ
What is the best way to store pumpkin dessert bites?
You can store them in an airtight container in the refrigerator for up to 5 days or freeze them for up to 2 months. Make sure to wrap them tightly in plastic wrap or parchment paper before storing.
Can I use fresh pumpkin instead of canned pumpkin puree?
While you can use fresh pumpkin, it’s recommended to use canned pumpkin puree for consistency and convenience. If using fresh pumpkin, ensure it’s cooked and pureed before adding it to the cream cheese mixture.
How do I prevent the chocolate coating from becoming too thick?
To prevent the chocolate coating from becoming too thick, you can add a small amount of shortening, such as coconut oil or vegetable shortening, to the melted chocolate. This will help maintain a smooth and even coating.
Can I make these dessert bites without a stand mixer?
Yes, you can make these dessert bites without a stand mixer. A hand mixer or a whisk can be used to mix the cream cheese mixture, although it may require a bit more effort.
What are some alternatives to graham cracker crumbs for the base?
You can use gingersnap cookies or other cookie crumbs as a substitute for graham cracker crumbs. Simply crush the cookies in a food processor or place them in a plastic bag and crush them with a rolling pin.
How do I achieve a smooth and creamy cream cheese mixture?
To achieve a smooth and creamy cream cheese mixture, make sure to beat the cream cheese until it’s softened and then gradually add the other ingredients, beating until well combined.