
No-Fail Raisin Pie Recipe: An Easy 3-Step Recipe Anyone Can Try
Imagine sinking your teeth into a slice of warm, flaky pie filled with sweet, plump raisins and a hint of citrus. Sounds like a dream, right? With this old-fashioned Raisin Pie recipe, you can turn that dream into a reality. Perfected over generations, this traditional dessert has been simplified into just three manageable steps, making it accessible to bakers of all skill levels.
This recipe is not just a treat for special occasions but a delightful dessert for everyday family meals. The combination of sweet raisins, optional nuttiness from walnuts, and bright citrus notes creates a rich and fruity filling that’s hard to resist. With pantry staples, you can make this timeless dessert year-round.
Let’s get started on this easy 3-step journey to making a delicious homemade fruit pie that’s sure to become a family favorite.
Table of Contents
The Charm of Old-Fashioned Raisin Pie
There’s something undeniably charming about this old-fashioned raisin dessert, a dessert that has stood the test of time. This classic treat has been a staple in American cuisine, evoking feelings of warmth and nostalgia.
A Timeless American Dessert: Old-Fashioned Raisin Pie
old-fashioned raisin dessert with raisin filling has its roots in traditional Amish and Mennonite communities, where it was often served at significant events, including funerals. The use of raisins, a pantry staple, made it a practical choice for times of need. The pie’s enduring popularity stems from its rich flavor profile and the nostalgia it evokes.
- Raisin pie evolved from a “funeral pie” to a beloved family dessert.
- Raisins were valued for their shelf-stable nature, making them a reliable ingredient year-round.
- Together, the light crust and creamy filling offer a perfectly balanced dessert experience.
Why This Raisin Pie Recipe Works for Everyone
This particular homemade fruit pie recipe is designed to be accessible to bakers of all skill levels. Its straightforward preparation and reliable results make it an ideal choice for both novice and experienced bakers. The recipe balances sweetness with subtle flavor notes, appealing to a wide range of palates.
By following this recipe, you can create a delicious old-fashioned raisin dessert that is sure to become a family favorite.
The History Behind Raisin Pie
You might be surprised to learn about the origins of sweet raisin filling pie, a dessert that has been a staple in American cuisine for centuries. The history of this beloved pie is deeply rooted in the traditions of early American settlers, particularly among the Amish and Mennonite communities.
Raisin Pie History: From Funeral Pie to Family Favorite
The Amish raisin pie originated as a “funeral pie,” a tradition noted by Atlas Obscura. The use of raisins was practical due to their shelf stability and availability throughout the year, making them an ideal ingredient for baking during emergencies like funerals. Over time, this treat evolved from being associated with mourning to becoming a cherished family dessert, appreciated for its flavor and convenience.
Why Raisins Make the Perfect Year-Round Pie Filling
Raisins are a perfect filling for this pie due to their natural sweetness, pleasant texture when baked, and ability to complement other flavors. Unlike fresh fruits, raisins provide consistent results regardless of the season. Their long-lasting nature, paired with dependable quality, makes them excellent for use in baked goods. The table below highlights the advantages of using raisins in pie recipes.
| Characteristics | Raisins | Fresh Fruits |
|---|---|---|
| Shelf Life | Long | Short |
| Seasonal Availability | Year-round | Variable |
| Flavor Profile | Sweet, consistent | Varies by fruit and season |
Everything You Need for a Raisin Pie Recipe
Before you start baking, let’s go over the necessary components for a perfect classic homemade pie recipe. Making this classic dried fruit pie from scratch requires attention to detail, but with the right ingredients and tools, you’ll achieve a delicious result.
Best Pie Crust Options
The crust is the cornerstone of any delicious raisin pie. You have the option to make your own pie crust from scratch or use a store-bought alternative. Homemade pie crust allows for customization and can be made with simple ingredients like flour, butter, and ice water. On the other hand, store-bought crusts save time and still yield a tasty pie. Pick the method that fits your personal baking style.
Key Ingredients for Classic Raisin Filling
The filling is where the magic happens, and for a raisin pie, you’ll need: 2 cups of raisins, 1 cup of brown sugar, 1 1/3 cups of water, 3 Tablespoons of cornstarch, 1/2 cup of fresh orange juice, 1 teaspoon of orange zest, 3 Tablespoons of fresh lemon juice, and 1/2 cup of coarsely chopped walnuts. The cornstarch helps thicken the filling, while the citrus elements brighten the flavor, and the brown sugar adds depth.
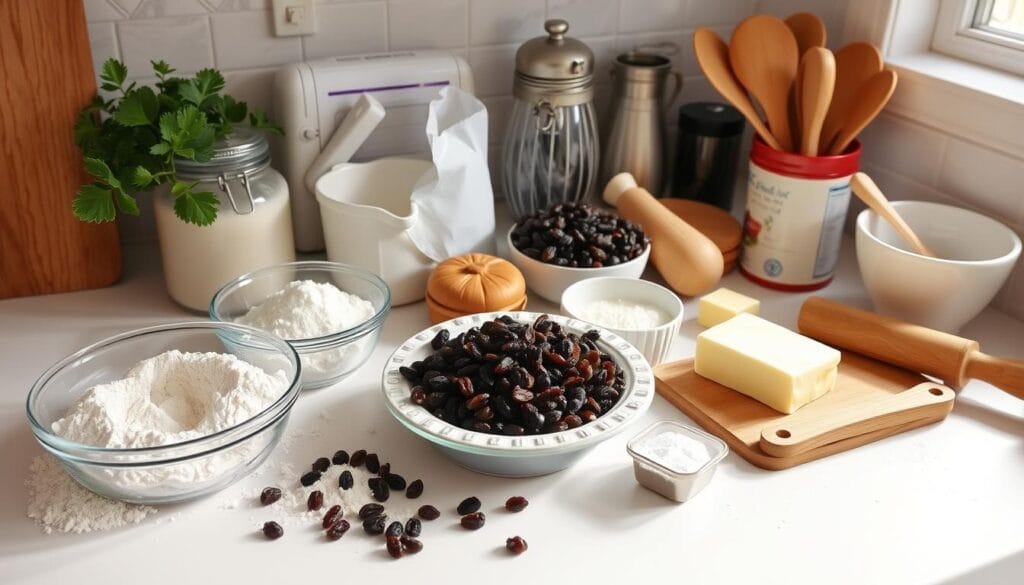
Kitchen Tools to Bake the Perfect Pie
To successfully make your raisin pie, you’ll need a few essential kitchen tools: a pie pan, a medium saucepan, and a pastry brush. These tools will help you prepare and bake your pie with ease. A pie pan is crucial for shaping your pie, while a medium saucepan is necessary for cooking the filling, and a pastry brush helps with egg wash application.
3 Simple Steps to Bake a Raisin Pie
Creating a perfect raisin pie is easier than you think, and it all starts with a simple three-step process. By following these steps, you’ll be able to create a delicious pie that will impress your family and friends. The process involves preparing the raisin filling, assembling the pie, and baking it to golden perfection.
Step 1: Prepare the Sweet Raisin Filling
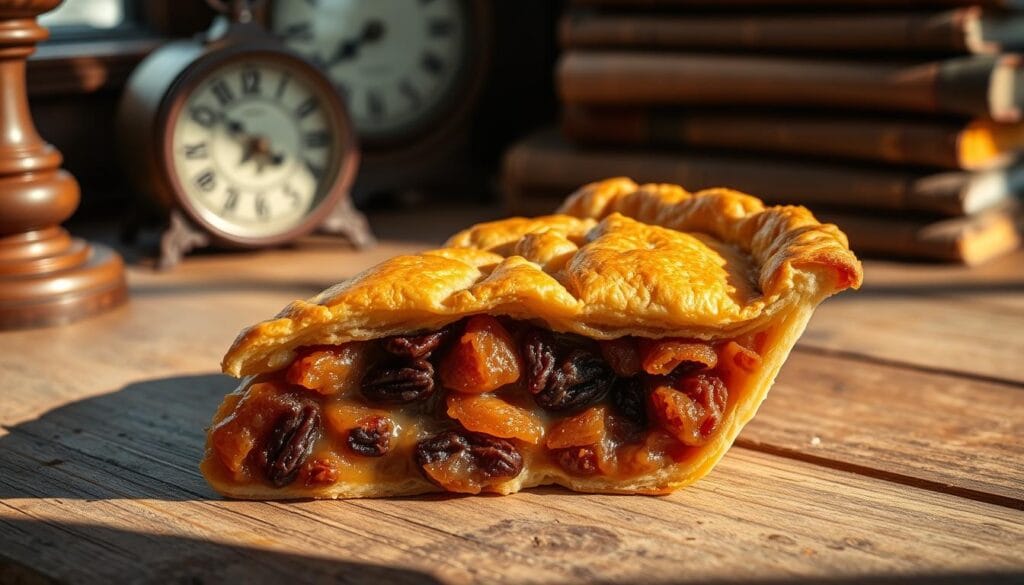
To start, you’ll need to prepare the raisin filling. In a medium saucepan, combine brown sugar, water, and cornstarch, stirring until the cornstarch is well dissolved. This step is essential to ensure a smooth, lump-free filling. Then, add orange juice, orange zest, lemon juice, and raisins. Stir the ingredients together over medium heat until the mixture begins to bubble and thickens. Let it cook for one minute, then take it off the heat. Stir in the walnuts for added crunch and flavor. Let the mixture cool completely.
Properly dissolving the cornstarch is essential to achieve a smooth filling. Continuously stir the mixture on medium heat until it reaches a thick consistency. The filling is ready when it has reached the desired consistency and has been removed from heat.
Step 2: Assemble Your Homemade Pie
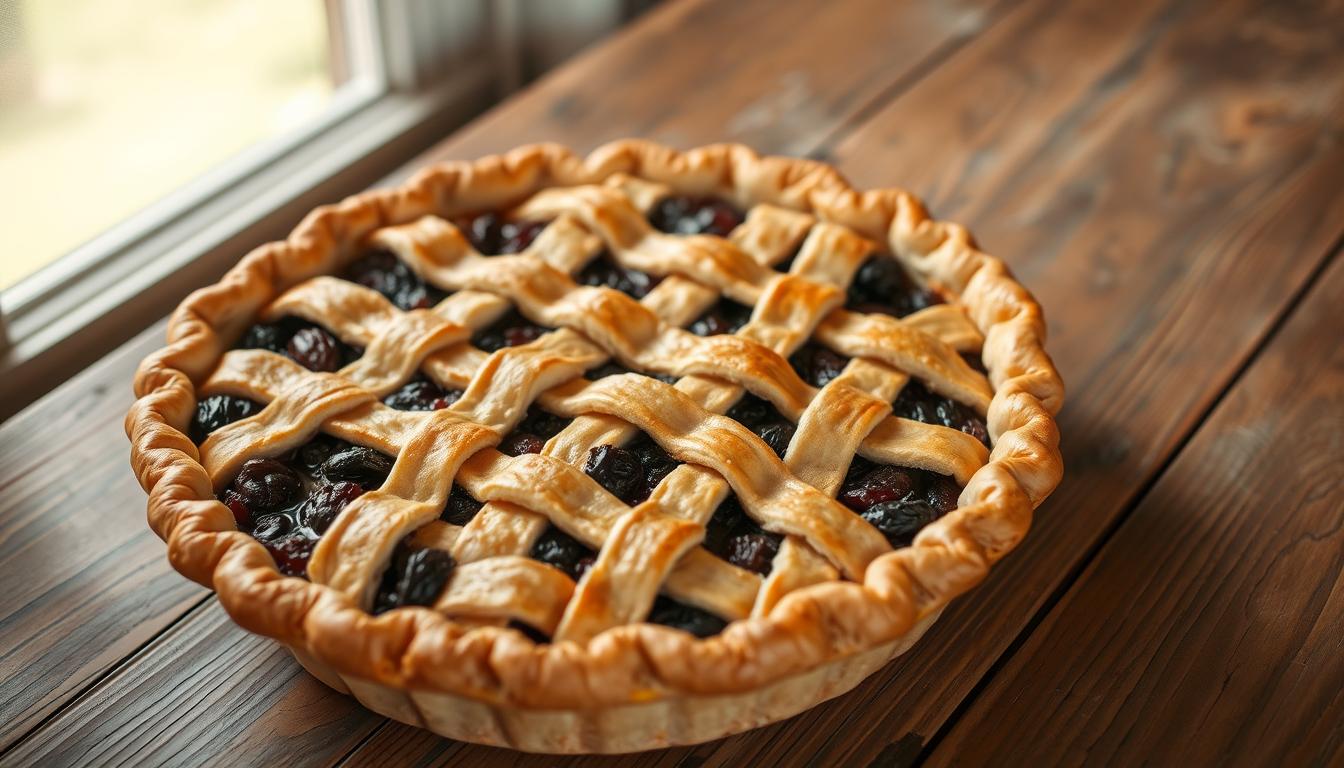
Once your filling is cooled, it’s time to assemble your pie. Line a 9-inch pie plate with your crust as the first step. Pour the cooled filling into the pie crust, making sure to fill it to the top. Next, lay a second crust over the filling and seal the edges by fluting or crimping. You can also create a decorative edge using your favorite technique. Use a pastry brush to lightly brush the top crust with egg white and sprinkle a little sugar on top for a golden finish.
To keep everything in place while baking, seal the edges of your pie well so the filling doesn’t leak out. Cut a few small slits in the top crust too—that way, steam can escape.
Step3: Bake to Golden Perfection
Preheat your oven to 400 degrees F. Bake the pie for 35 to 40 minutes, or until the crust turns a golden brown. Check on your pie around the 30-minute mark, and if it’s reached your desired level of browning, cover the top with aluminum foil to prevent over-browning. This will ensure that your pie is cooked to perfection without burning the crust.
Baking the pie at the right temperature and for the right amount of time is crucial to achieving a perfectly cooked pie. Make sure to check on your pie regularly to avoid overcooking.
Tips for Perfect Raisin Pie Every Time
Making the perfect raisin pie requires some insider knowledge. To achieve a deliciously balanced and visually appealing dessert, consider the following expert advice.
Troubleshooting Common Baking Issues
Common challenges when making a raisin pie include runny filling, soggy bottom crust, and over-browned edges. To avoid these issues, check your pie around the 30-minute mark during baking. If the crust has browned to your liking, loosely cover the top with foil for the final 10 minutes of baking. Ensuring the filling is at room temperature before baking can also help prevent a runny consistency.
Make-Ahead and Storage Options for Raisin Pie
You can prepare components of your pie with raisin filling ahead of time. You can make the pie filling up to a week ahead and keep it in the fridge. The crust’s flexible too—prep it a day or two early, or freeze it for up to three months. If you’re freezing a baked pie, let it cool first, then wrap it up in foil and pop it in the freezer. When you’re ready to eat, thaw it in the fridge the night before, then give it a quick warm-up in the oven.
Conclusion: Enjoy Your Classic Homemade Raisin Pie
Creating a mouth-watering funeral pie is easier than you think, thanks to this straightforward 3-step recipe. This old-fashioned pie has been perfected to balance flavors from sweet raisins, nutty undertones, and a hint of citrus. You can enjoy your on various occasions, from everyday treats to special events like Thanksgiving.
Feel free to experiment with variations, such as adding spices or nuts, or trying a sour cream raisin pie version. Once you’ve got this pie down, you’ll feel more ready to take on other baking challenges. Serve it with vanilla ice cream or whipped cream for an extra delight. Got any questions or want to share how it went? Drop a comment below!
FAQ
What is the best type of crust to use for a raisin pie?
A homemade crust is often preferred for a classic pie. A simple mix of flour, cold butter, and ice water makes a flaky base that pairs perfectly with the sweet raisin filling. If you’re short on time, a store-bought crust works too.
Can I use other types of dried fruit instead of raisins in this pie?
Yes! While this traditional dessert uses raisins for their chewy texture and natural sweetness, you can experiment with cranberries, dates, or cherries. Just note that the flavor and texture will differ from the classic raisin dessert.
How do I prevent my raisin pie filling from becoming too runny?
To avoid a runny filling, cook the raisin mixture over medium heat, stirring constantly, until it thickens. Adding a little cornstarch or flour helps create the perfect consistency for a smooth, sliceable raisin pie.
Can I make raisin pie ahead of time?
Absolutely! You can prepare the filling and crust in advance, storing them separately in the fridge for up to 24 hours. Assemble and bake when ready. A make-ahead raisin pie is perfect for holidays or family gatherings.
What’s the secret to getting a golden-brown raisin pie crust?
Brush the top of your pie with butter or an egg wash before baking for a shiny, golden finish. You can also bake at a slightly higher temperature for a short time—just keep an eye on your homemade pie to prevent over-browning.
Can I freeze a homemade raisin pie?
Yes, this homemade fruit pie freezes beautifully for up to 3 months. Once cooled, wrap it tightly in foil or plastic wrap. Thaw overnight in the fridge and reheat in the oven until warm before serving.
Bake It. Love It. Tell Us About It.
There are no reviews yet. Be the first one to write one.